|
Hands on Crafts For Kids is the resource for kids craft projects and instructions for kids 6-12 and parents, teachers and other group leaders. It includes school and curriculum based projects, multi cultural projects, and every day, holiday and seasonal ideas. |
| 1501-3 | Print | Close [X] |
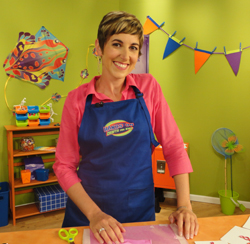
Crafty Creatures Watch the video for this project online at: |
 |
Always cover your work surface with a mat or some type of protective covering like wax paper or plastic. 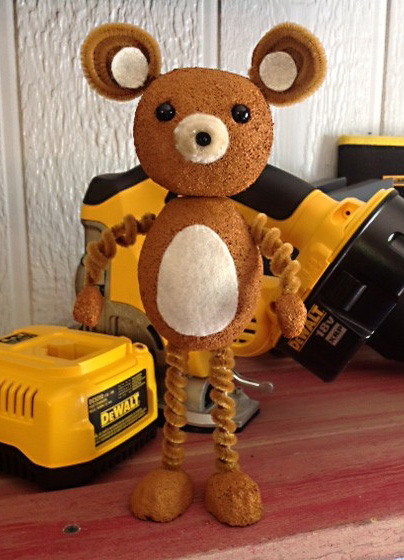 Age Range: 7 to 12 Grade Range: 2 to 6 Skill Level: Moderate Appropriate for These Special Events: Supports Subject Area(s) of: Time Needed for Project: Main Materials:
Basic Materials: Click here to download pattern image. Instructions: 2. Roll the 3" ball back and forth to make it an oval shape. 3. Paint all foam pieces and dowel rod with the acrylic craft paint. 4. Ear pieces: Cut the ear pattern pieces from tag board and paint to match bear. Once dry, cut the notch in the bottom center of the tab and overlap the tab pieces to make the ear curl. Glue to secure. Cut ear and belly pattern pieces from the cream felt. Coil a chenille stem in a circle to sit on top of ear piece. Repeat to create a second coil and glue on top of ear pieces followed by small felt circles. 7. Arm/paw pieces: Cut a chenille stem in half. Poke skewer into end of a paw piece and remove. Glue end of chenille stem into end of paw. Repeat for opposite side. Wrap a second chenille stem around the arm and trim when you get to the end. Poke a hole in both top sides of the egg body and glue in the arm pieces. 8. Leg/feet pieces: Cut the dowel rod in half. Glue the rod in the end of the feet pieces and then into the bottom of the egg body. Wrap a chenille stem around the leg and trim at the end. Tip: To make the bear stand easier, embed fishing weights or coins into the bottom of the Styrofoam™ feet. 9. Glue the felt piece to the belly. 10. Make two slits at the top of the head into the foam and glue in the ear pieces. 11. Push the bead eyes into the foam for eyes. Remove and then glue in place. 12. Glue the small black pom-pom on top of the tan pom-pom and glue to front of face. Use a straight pin to hold it together while it dries. 13. Poke a toothpick into the top of the egg body. Add glue to the base of the toothpick and set head piece on top.
|
Our Partners:
|


| E-mail questions about Hands On Crafts for Kids to info@craftsforkids.com ©Copyright 2012 Katherine Stull, Inc. |