|
Age Range: 7 to 12
Grade Range: 2 to 6
Skill Level: Moderate
Appropriate for These Special Events:
Every Day and Rainy Days
Supports Subject Area(s) of:
Social Studies
Language Arts – e.g. step by step instructions
Mathematics - measuring
Visual Arts
Time Needed for Project:
1 hour plus drying time
Main Materials:
Black felt
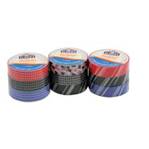
Elmer's® Designer Masking Tape
Horizon acrylic flower gems
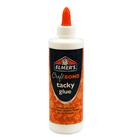
Elmer's® Thick Craft Bond Glue
Horizon Clothes pins
FloraCraft® 1.5" Styrofoam™ ball
Wood ring for doll stand
2" Pepperell Rexlace™
Horizon chenille stems in cream
Plaid® Apple Barrel paint in cream
Elmer's® white school glue
Elmer's® Paint pens
Basic Materials:
Straight pens
Scissors
Small paper parasol
Stiff paint brush
Clothes pin with spring
3" square of white card stock
Hole punch
Black paper
Red paper
 Click here to download a pattern for this project in PDF format Click here to download a pattern for this project in PDF format
Instructions:
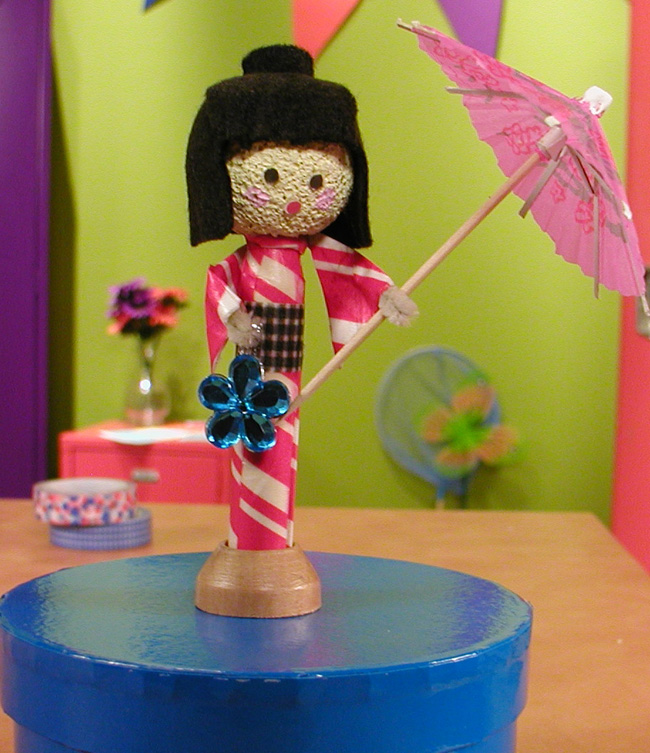
- Print the patterns for the doll's hair and sleeves found in these instructions.
- Trace the hair pattern onto black felt and cut out.
- Paint the foam ball with the cream acrylic paint.
- Cover the clothes pin with Designer Masking tape. Add a wrap around the doll's waist with a contrasting color.
- Glue the hair to the top of the head with thick glue. Fold the back side flaps in and glue followed by the top back flap. Straight pins help to hold the hair in place while the glue dries. Fold the front sides in and glue and end with the bangs.
- Cut a chenille stem to 6" and cover with Designer Masking tape, leaving a 1/2" of the stem showing at both ends for the hands.
- Wrap chenille piece around the dolls neck.
- Trace the sleeve pattern onto the card stock. Cover sleeves with Designer Masking tape, trimming the edges as you go.. Place the sleeve piece over the arm and secure with white school glue. Use clothes pins to hold the sleeve in place while it dries.
- Once hair is dry, push the ball onto the rounded end of the clothes pin.
- Use hole punch to make dots for eyes and a dot for the mouth and glue in place.
- Optionally, pink cheeks can be added with pale pink paint.
- To make a flower purse, cut a 1" piece of Rexlace™ and fold in half. Add a dot of glue on the back of a flower gem and sandwich the Rexlace™ between two flower gems. Use a clothes pin to hold it in place while it dries.
- The doll will stand freely when placed in the wooden ring.
|