|
Age Range: 7 to 12
Grade Range: 2 to 6
Skill Level: Moderate
Appropriate for These Special Events:
Every Day and Rainy Days
Supports Subject Area(s) of:
Language Arts – e.g. step by step instructions
Mathematics - measuring
Visual Arts
Time Needed for Project:
1 hour
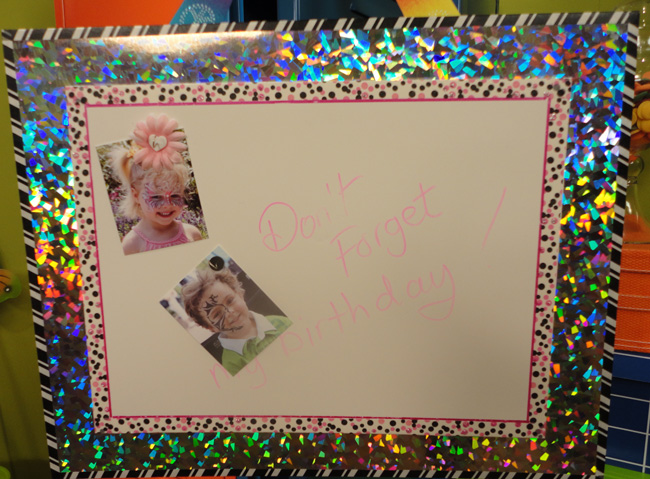
Remind your kids to clean their room, pick up toys and more with this custom dry erase board for their room, playroom, or any room in the house!
Materials:
Elmer’s® Foam Boars – Holographic
Elmer’s® Dry Erase Foam Board
Elmer’s® Craftbond™ Paper and Fabric Glue
Elmer’s® Craftbond™ Double Sided Scrapbooking Tape – Permanent
Elmer’s® Painters Paint Markers – Neon Pink
Elmer’s® Designer Masking Tape
Elmer’s® Swirl Glam Glitter Glue
X-ACTO® Craft Knife
X-ACTO® Metal Ruler
X-ACTO® Self-Healing Craft Mat
X-ACTO® Precision Scissors
24” of Ribbon
Large, Colorful Bulldog Clip
Instructions:
- Cut the 20” x 30” piece of holographic foam board in half. Each piece will measure 15” x 20”.
- Cut a 10” wide strip off one end of the 20” x 30” piece of dry erase foam board then cut 5” from one end so the piece measures 10” x 15”.
- Cover the edges of the holographic foam board and the dry erase board with designer tape. Make sure the tape extends over the edge to the back of the boards.
- With edges aligned, create a border around the edge of the dry erase board with designer tape. Using a ruler, outline the inside edge of the tape with the pink painter.
- Add a little bling to the tape by adding randomly placed dots of swirl glitter glue on top of the tape. Set aside to let dry.
- Adhere the ends of the ribbon to the back of the holographic foam board with paper and fabric glue. Adhere the dry erase board to the center of the holographic foam board with double sided tape.
- Clip the bulldog clip at the center of the ribbon for a hanger.
|
