|
Hands on Crafts For Kids is the resource for kids craft projects and instructions for kids 6-12 and parents, teachers and other group leaders. It includes school and curriculum based projects, multi cultural projects, and every day, holiday and seasonal ideas. |
| 1606-3 | Print | Close [X] |
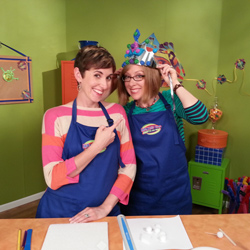
PAPER CROWN
|
 |
Always cover your work surface with a mat or some type of protective covering like wax paper or plastic.
Age Range: 7 to 12
Grade Range: 2 to 6
Skill Level: Moderate
Appropriate for These Special Events:
Every Day and Rainy Days
Supports Subject Area(s) of:
Social Studies
Language Arts – e.g. step by step instructions
Mathematics - measuring
Visual Arts
Time needed for project:
1 hour
Main Materials:
Elmer’s® School Glue Gel
Elmer’s® Swirl Glam Glitter Glue
Elmer’s® Glue-All
FloraCraft® Styrofoam™ foam sheet – ½” thick
FloraCraft® Styrofoam™ – 1” foam balls
Right click this link and choose "Save As" to download a pattern for this project.
Basic Materials:
Silver cardstock – 12” square
½” flat brush
Small foam plate or foil
Glitter – assorted colors
Toothpicks
Serrated knife
Scratch paper
Paper towel
Ribbon – 1 yard silver metallic
Scissors
Hole punch
Pushpin
Pencil
Craft stick
Transparent tape
Instructions:
- Cut out diamond shape pattern. Place on foam sheet then use serrated knife to cut out shape. Repeat step creating three more. Cut five balls in half.
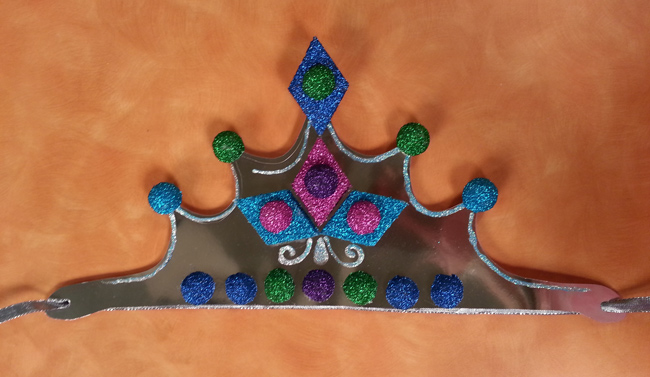
- Squeeze Clear Glue onto plate. Push too toothpicks into foam ball – this will keep the ball from twisting. Place scratch paper on work surface. Use brush to paint an even coat of glue over entire surface then sprinkle liberally with glitter. Tap toothpicks a few times to remove excess glitter then press into foam to hold till dry. Repeat step with remaining balls referring to photo for color of each. Let dry. Tip: excess glitter can be poured back into bottle.
- For diamonds brush glue around sides, top and about ¼” in on the bottom. Apply glue to top of half ball and in about ¼” on back. Apply glitter and let dry.
- Place a piece of scratch paper under crown pattern then cut out design creating two at the same time. Line up centers and tape together.
- Position pattern on back of silver paper and cut out.
- Punch a hole at each end of crown where shown on pattern. Thread ribbon through holes and knot ends of ribbons. Lay flat on work surface.
- Trace and cut keyhole pattern from silver paper. Position blue diamond on centertip and glue in place. Apply glue to back of paper piece then press onto back of diamond – this will add strength to this section.
- Use scissors to cut rounded corners from a craft stick. Insert half way into glittered balls. Apply glue to a tip then press ball in place. Repeat with remaining balls.
- Position the half balls along bottom edge of crown as shown. The paper is slick – use the pushpin to draw a small “x” where each ball is to be glued. Apply glue to back of ball then press in place.
- Position diamond is center of crown, draw an “x” then glue in place. Glue half balls on surface. Let dry.
- Detail with Turquoise Glitter Glue. Start paint on paper towel then add paint where shown keeping tip clean with paper towel. Let dry.
Our Partners:
|

E-mail questions about Hands On Crafts for Kids to info@craftsforkids.com |