|
Hands on Crafts For Kids is the resource for kids craft projects and instructions for kids 6-12 and parents, teachers and other group leaders. It includes school and curriculum based projects, multi cultural projects, and every day, holiday and seasonal ideas. |
| 1609-4 | Print | Close [X] |
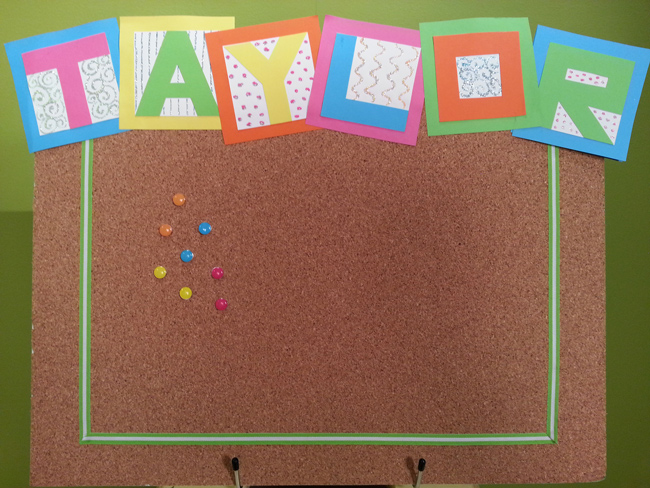
LETTER MESSAGE BOARD Designed by: Cheryl Ball |
 |
![]() When you see the “helping hand” symbol on a project, it means you may need adult supervision to do the project.
When you see the “helping hand” symbol on a project, it means you may need adult supervision to do the project.
Always cover your work surface with a mat or some type of protective covering like wax paper or plastic.
Age Range: 7 to 12
Grade Range: 2 to 6
Skill Level: Moderate
Appropriate for These Special Events:
Every Day and Rainy Days
Supports Subject Area(s) of:
Language Arts – e.g. step by step instructions
Mathematics - measuring
Visual Arts
Time needed for project:
2 hours – allow time for glue to dry
Main Materials:
Elmer’s® Cork Covered Foam Board
Elmer’s® Swirl Glam Glitter Glue
Elmer’s® No-Wrinkle Glue
Elmer’s® Craft Bond Tacky Glue
Right click this link and choose "Save As" to download a pattern for this project.
Basic Materials:
Craft knife
Cardstock – desired colors and white
Pencil
Ruler
Scissors
Ribbon – 2 yards ½” wide
Paper towels
Pop-tops (2)
Instructions:
- Measure and cut 4” squares from colored cardstock, cutting one for each letter.
- Measure and cut 3” squares from colored and white cardstock.
- Draw letters onto colored cardstock using ruler and pencil to create 3/4” thick lines for block letters, referring to photo as needed. Carefully cut out each letter.
- Use thin tip of No-Wrinkle Glue to add a very thin line around edge on back of each letter. Carefully press onto white square, smoothing in place. Repeat with remaining letters and let dry. Use scissors to trim edges if needed.
- Start flow of Swirl Glue on paper towel. Detail with a different design and color on white paper of each letter, referring to photo. Let dry.
- Use wide tip of No-Wrinkle Glue to back of layered square then center and press onto larger colored squares. Let dry.
- Use pencil and ruler to measure and draw a line across center of board. Use craft knife to carefully along line.
- Working in sections, apply a thin bead of white glue onside of board. Press ribbon into glue and trim ends starting and stopping along cut edge. Measure and draw a line about 2” in from edge. Apply a thin bead of glue along line then press on ribbon smoothing into place. Cut end at a diagonal. Repeat step with remaining two sides.
- Position letters along cut edge of board then glue into place.
- To create hangers, glue a pop-top at corners along top edge on back. Let dry.
Our Partners:
|

E-mail questions about Hands On Crafts for Kids to info@craftsforkids.com |