|
Hands on Crafts For Kids is the resource for kids craft projects and instructions for kids 6-12 and parents, teachers and other group leaders. It includes school and curriculum based projects, multi cultural projects, and every day, holiday and seasonal ideas. |
| 1610-4 | Print | Close [X] |
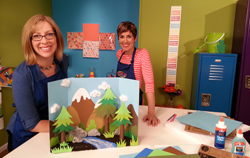
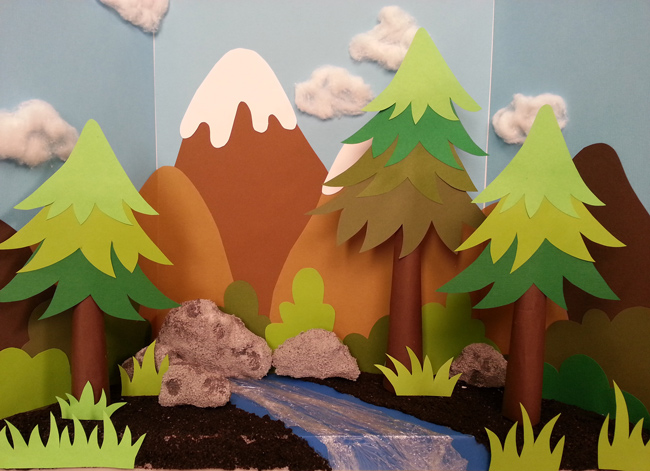
FOREST SCENE |
 |
![]() When you see the “helping hand” symbol on a project, it means you may need adult supervision to do the project.
When you see the “helping hand” symbol on a project, it means you may need adult supervision to do the project.
Always cover your work surface with a mat or some type of protective covering like wax paper or plastic.
Age Range: 7 to 12
Grade Range: 2 to 6
Skill Level: Moderate
Appropriate for These Special Events:
Every Day and Rainy Days
Supports Subject Area(s) of:
Social Studies
Language Arts – e.g. step by step instructions
Visual Arts
Time needed for project:
2 to 3 hours – allow adequate drying time
Main Materials:
Elmer’s® School Glue Gel
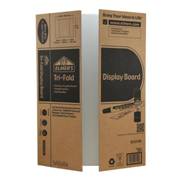
Elmer’s® Display Board – 14” x 22”
Elmer’s®Board Mate Glue Pen
Elmer’s® Dual Tip Glue Stick
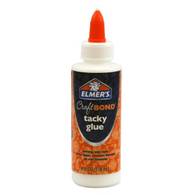
Elmer’s® Tacky Glue
FloraCraft® StyroFoam™ Sheet– 18” X 24”
Right click on the links below and choose "Save As" to download patterns for this project:
Pattern 1
Pattern 2
Pattern 3
Pattern 4
Pattern 5
Pattern 6
Basic Materials:
Cardstock – light blue 12” square (2), light, medium and dark browns and greens, bright blue, white
Coffee grounds
Scissors
Craft stick
Acrylic paint – light gray and medium gray
½” paint brush
Foam plate or foil
Cotton balls
Pencil
Rubber bands
Plastic wrap
Straight pins
Serrated knife
Ruler
Plastic tub

Instructions:
- Cut out patterns from pattern sheets. Trace each onto cardstock on colored paper cutting number indicated.
- Trim a piece of blue paper to fit back panel of board. Use wide tip of No-Wrinkle Glue to add glue to back then press in place lining up with top edge of board. Trim other paper to fit sides then glue in place.
- Use ruler and pencil to draw a line 1” from bottom edge on board.
- Position mountains in place creasing sections that will be on folds and trimming as needed to fit. Glue in place gluing just above pencil line and evenly along sides. Glue snow into place.
- Position bushes in place cutting more as needed then glue in place as shown.
- To create clouds, slightly pull apart cotton balls. Position where desired then glue in place adding glue to paper and pressing on cotton ball.
Base:
- Place board on foam sheet placing corners of board at corners of foam. Use a pencil to trace along inside edge of board on foam. Use serrated knife to cut along line.
- Cut out stream from bright blue paper, position at back corner as shown and glue in place.
- Add about 1 cup of coffee grounds into plastic tub. Pour in about a third of bottle of Clear Graft Glue. Use craft stick to thoroughly mix together adding more coffee or glue as needed for spreadable consistency.
- Squeeze clear Glue over foam on one side of stream then spread with craft stick – this will allow the coffee to adhere better. Use craft stick to “frost” coffee mixture onto foam in an even layer working just over edge of stream and along front edge. Repeat step with other side of base. Let thoroughly dry.
Rocks:
- Use knife to cut different irregular shapes from remaining foam. Cut, press and pick off sections to create a rock form. Create five different sizes.
- Squeeze a puddle of both paints onto foam plate. Insert craft stick into base of each rock – this will make it easier to paint. Use flat brush to paint foam with light gray paint, dip brush into darker gray then add dabs of paint as shown to create depth. Paint all rocks then press craft stick into extra foam to hold till dry.
Trees:
- To create trunks, cut an angled piece of brown paper the width of paper. Carefully roll into a cone shape as shown. Apply glue to edge then press in place holding with rubber bands at top and bottom of trunks till dry. Remove rubber bands then evenly trim bottom of trunk so it will stand.
- Layer parts of tree together layering three for smaller and four for the larger then glue together.
- Slightly flatten tip of trunks then glue branches to this flattened area.
Assembly:
- Place board along back edge of base then pushin straight pins to hold in place adding along back edge in several places on each side.
- To create water, crumple plastic wrap lengthwise. Add glue to back of stream then press plastic into place. Position down center of stream. Add a thin layer of clear glue along front edge and press plastic into place. Fold over edge then under base gluing and pining in place till dry.
- Glue rocks in place. Position trees where shown. Add glue around bottom edge of trunk, then press in place holding with a pin till dry. Glue grasses in place.
Our Partners:
|

E-mail questions about Hands On Crafts for Kids to info@craftsforkids.com |