Age Range: 7 to 12
Grade Range: 2 to 6
Skill Level: Moderate to Advanced
Appropriate for These Special Events:
Halloween, Every Day and Rainy Days
Supports Subject Area(s) of:
Language Arts – e.g. step by step instructions
Mathematics – measuring
Time needed for project:
2 hours including drying time
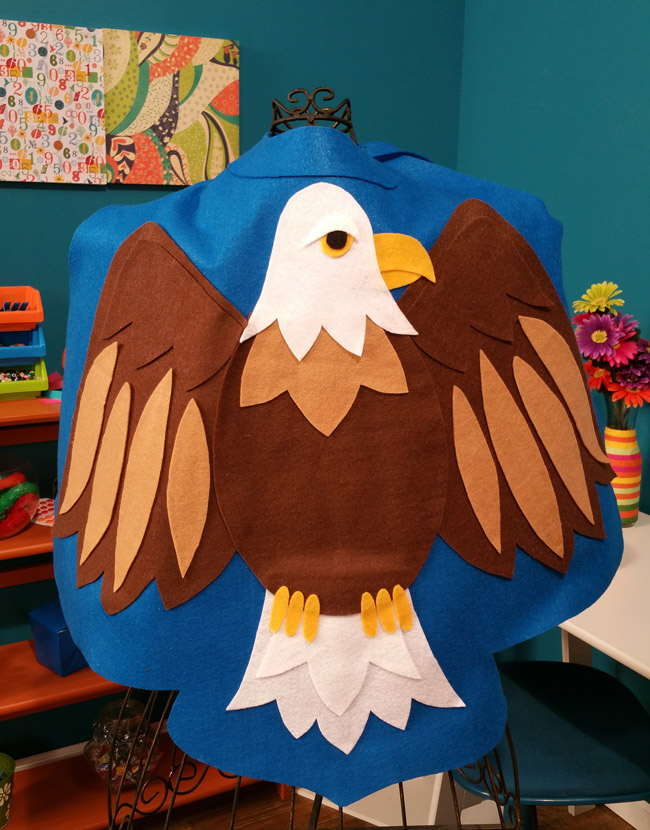
EAGLE CAPE
Designed By Cheryl Ball
Materials needed:
Elmer’s® Glue-All®
The Kunin™ Group Eco-fi™ Classicfelt™ yardage – Royal blue – 1 yard, brown ½ yard
The Kunin™ Group 9” x 12” Craft Cuts Eco-fi® Classicfelt™ – tan (2), white (3), yellow (1), black (1)
Elastic – black narrow – 1/2 yard
Ribbon
Scissors
Safety pins
Scotch tape
Scratch paper
Pattern pieces
Directions:
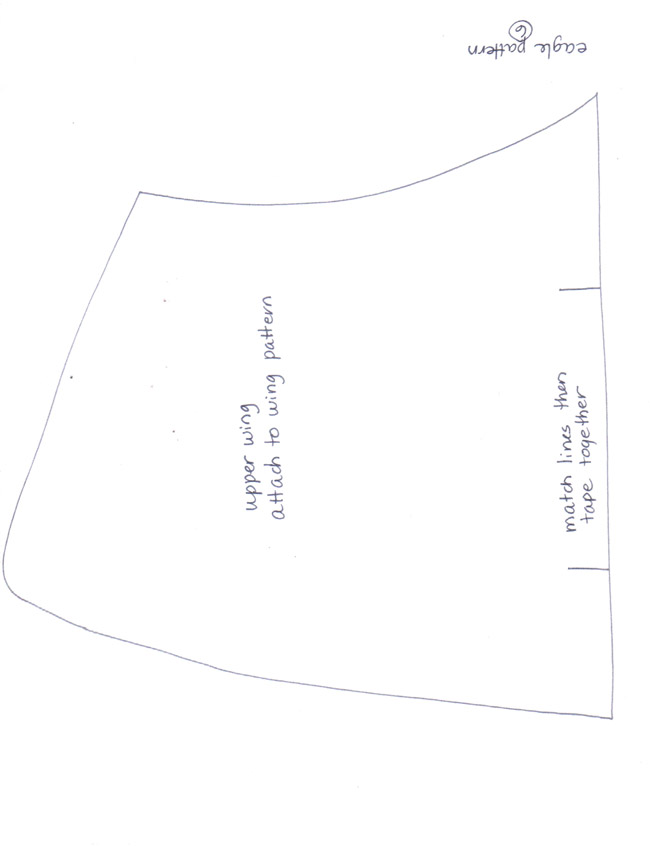
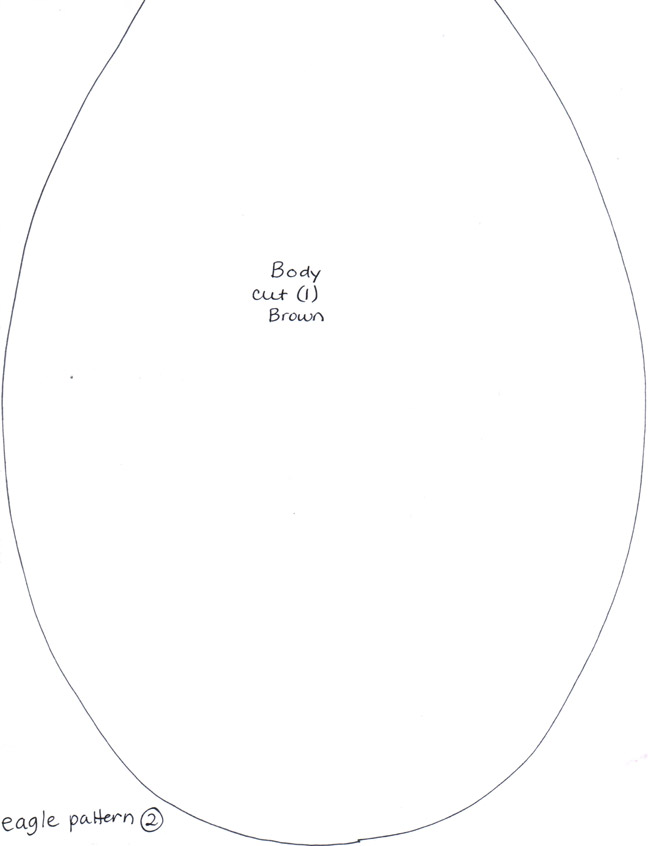
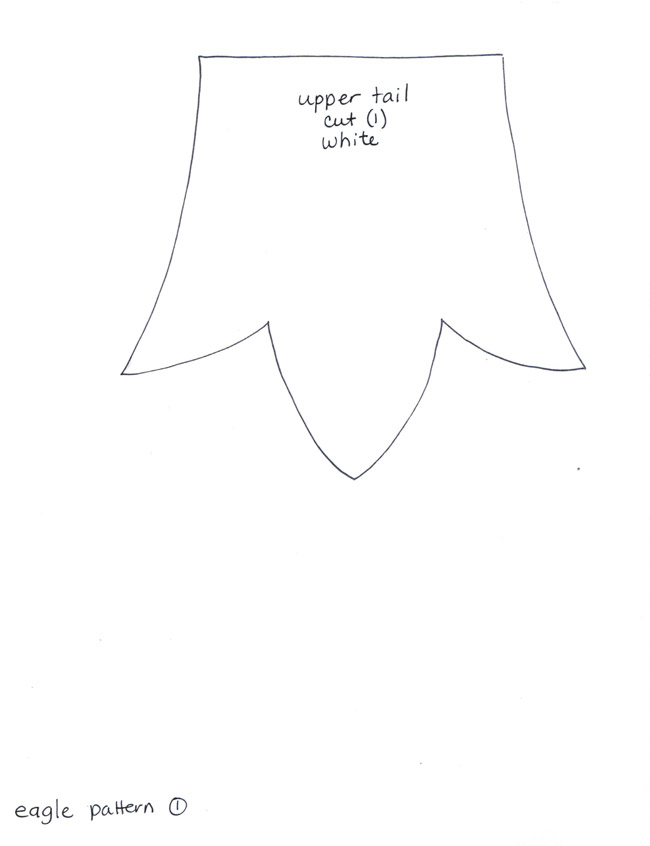
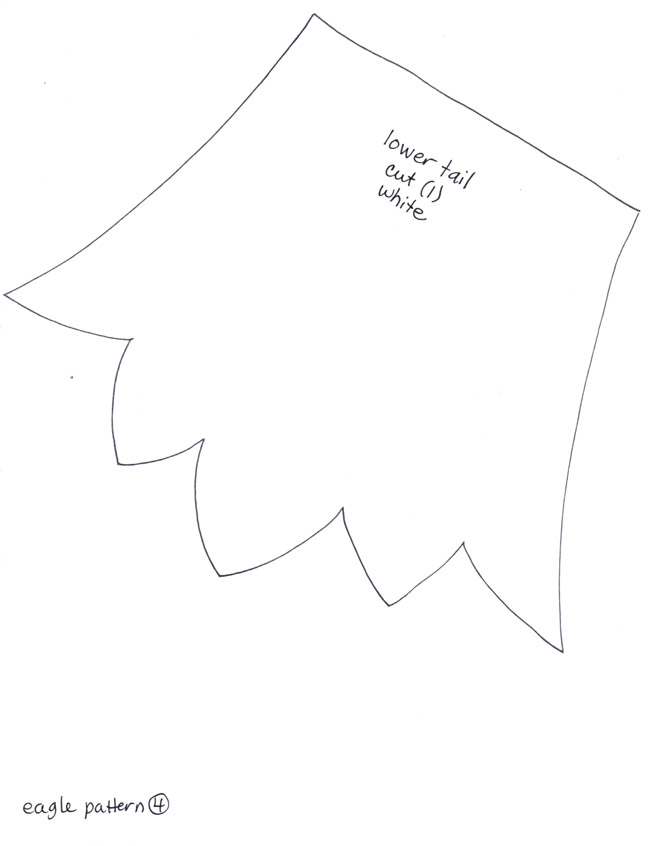
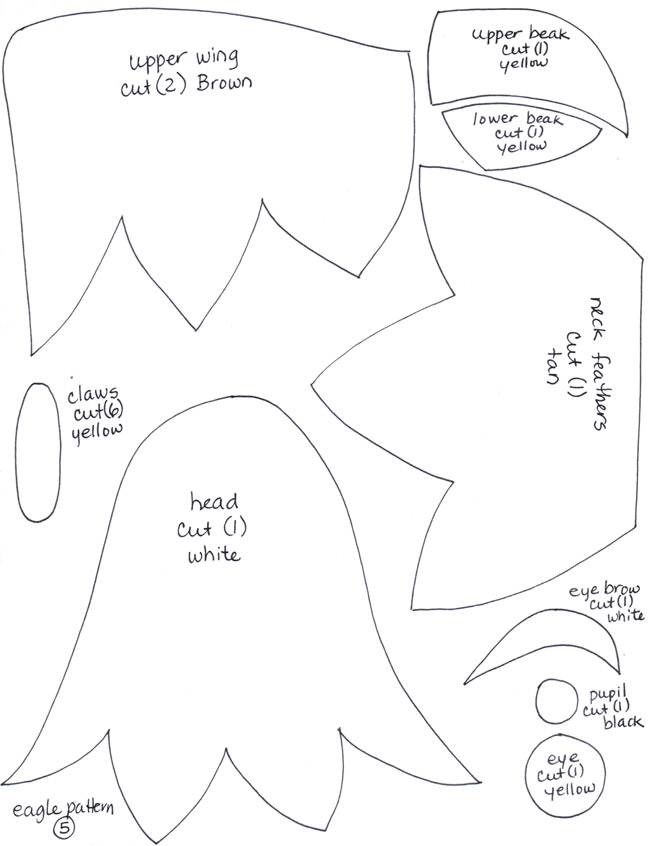
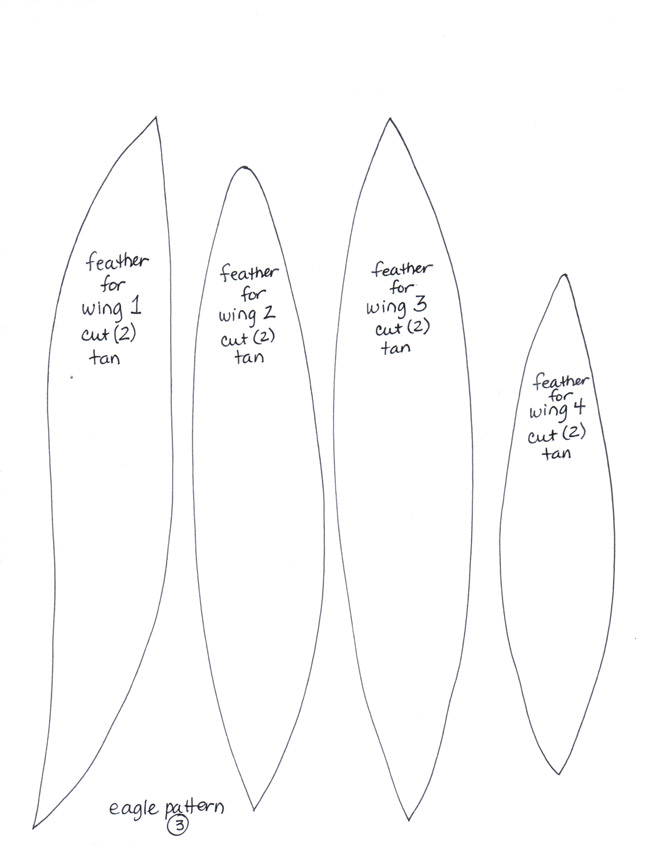
- Cut eagle patterns from pattern sheet. Tape wing sections together as directed.
- Pin and cut out felt pieces cutting number and color indicated on each pattern piece.
- Cut blue felt in half widthwise and place on work surface. Refer to photo for placement of all pieces. Glue eye parts together onto face. Glue tail sections together lining up top edges. Position the following pieces in place in the following order: Tail section about 6” up from lower edge, body - slightly overlapping tail, large wings under body about ½” or so, top wing sections, tan feathers following order on pattern pieces, neck feathers, head, then beak pieces tucking under head. Pieces can be pinned in place if needed.
- Start gluing sections to blue felt. Lift a section, apply glue to back then press in place. Glue all pieces in place.
- Measure from shoulder to shoulder by holding the cape up to the shoulders as shown below by Katie and Jenny.

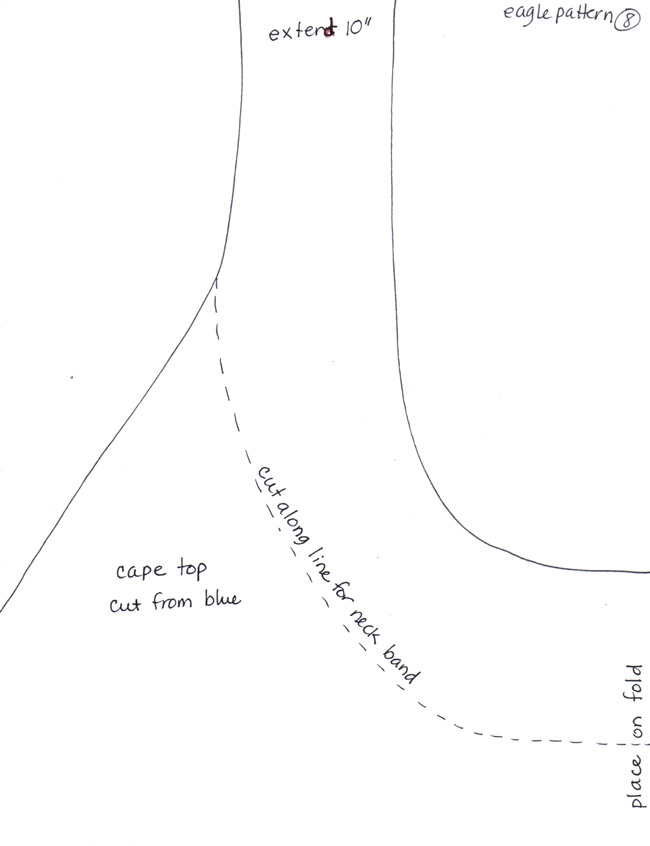
- Cut out neckband pattern then pin on fold of blue felt. Cut out. Line up neckline on cape and glue in place, this will create ties for cape.
OPTIONAL (if not using neck pattern):
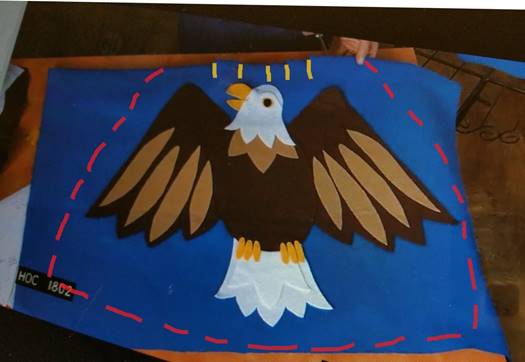
- Cut slits 2” apart in top of cape to weave in ribbon. (See yellow lines above).
- Trim any excess fabric to size and weave ribbon in and out of slits in neck.
- Cut out cape starting at shoulder pins. (See red dotted line above).
- Cut elastic piece in half. Knot ends together creating a 3” loop for hand to slip through. Trim ends to about ½”. Try on cape and pin and glue elastic alongside of cape where wrists will be.

|