Age Range: 7 to 12
Grade Range: 2 to 6
Skill Level: Moderate
Appropriate for These Special Events:
Every Day and Rainy Days
Supports Subject Area(s) of:
Language Arts – e.g. step by step instructions
Visual Arts
Time needed for project:
1 hour plus drying time
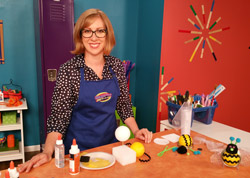
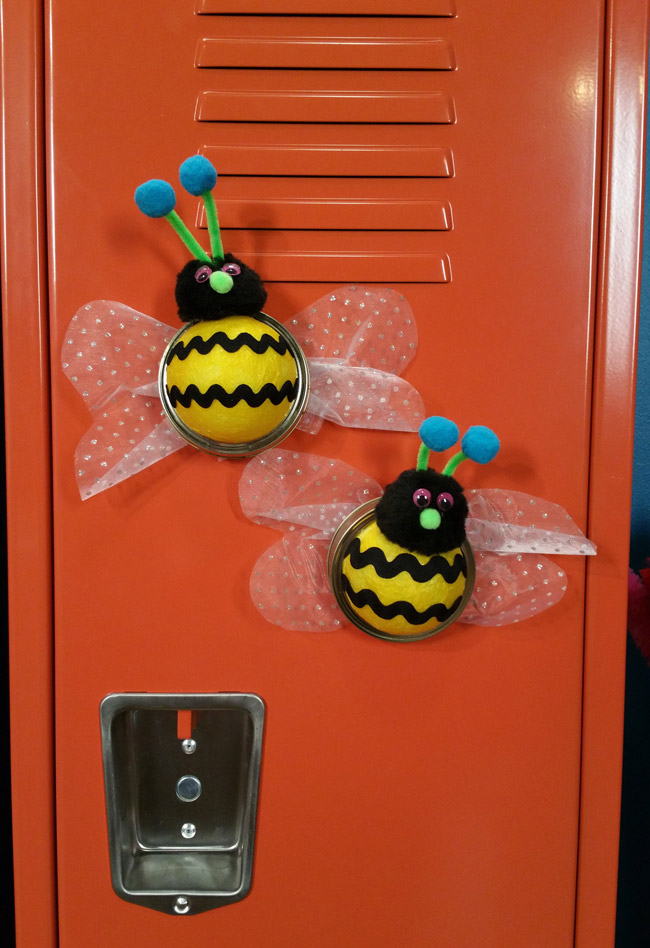
BEE RING MAGNET
Designed by Cheryl Ball
Materials needed:
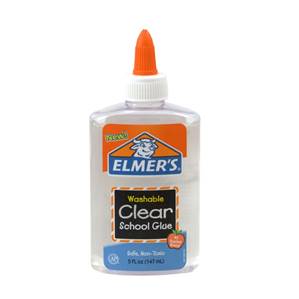
Elmer’s® Clear School Glue
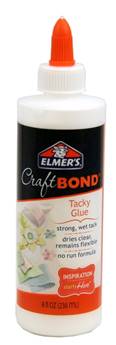
Elmer’s® Craft Bond Tacky Glue
FloraCraft® Styrofoam™ Brand Foam – 3” ball
FloraCraft® Design it® SimpleStyle® Glittered Organza – Silver dot
Wide mouth jar ring
Tissue paper – bright yellow
Pom-poms – (1) 2” black, (2) ¾” turquoise, (1) ¼” lime
Pipe cleaner – lime
Wiggly eyes - (2) ¼” purple
Rick Rack – medium black – 12”
White felt – small piece
Magnet – 1”
Scissors
Plastics serrated knife
Foam plate
Pencil
Toothpicks
Ruler
Sewing pin
Directions:
- Use scissors to cut 1” strips of yellow tissue then cut strips into squares.
- Squeeze a puddle of Clear Glue onto foam plate. For ease of holding, insert three toothpicks into ball.
- Working in sections, use brush to apply an even coat of glue to ball. Tap brush onto tissue piece, press into place then brush to smooth. Repeat step with another square slightly overlapping the first. Repeat step adding more glue to surface as needed till ball is ¾ covered. Set aside to dry.
- To create wings, measure and cut 10” of organza then cut off 1” from strip – this will be used later. Use fingers to gather organza at center then tie strip around center to secure. Trim ends to about ½”.
- Insert ball into jar ring till snug. Use a pencil to run around back of ring on ball. Remove ball then use serrated knife to cut along line.
- Cut rick rack strip in half, and apply a thin bead of Craft Bond Glue to one side. Position onto ball where shown, pressing to secure. Repeat with other piece.
- Place ring on felt, trace around with pencil then cut out.
- Insert ball into ring till snug. To hold in place add a drop of glue at back where rickrack meets the ring, adding glue to all four sections. Add glue to cut side of foam, press on felt circle and let dry.
- Add a drop of glue to knot of wings and press in place at back toward top of ring. Insert pin to hold in place. Glue magnet over knot. Let dry.
- To create antennae, cut a 4” length of lime pipe cleaner and fold in half. Add a drop of glue to each end. Open fibers of turquoise pom pom, press in ends then press fibers closed.
- Glue head to body where shown. Open fibers of pom pom add a drop of glue to fold of antennae then insert and press together. Add eyes and nose.
|