|
Hands on Crafts For Kids is the resource for kids craft projects and instructions for kids 6-12 and parents, teachers and other group leaders. It includes school and curriculum based projects, multi cultural projects, and every day, holiday and seasonal ideas. |
| 1805-2 | Print | Close [X] |
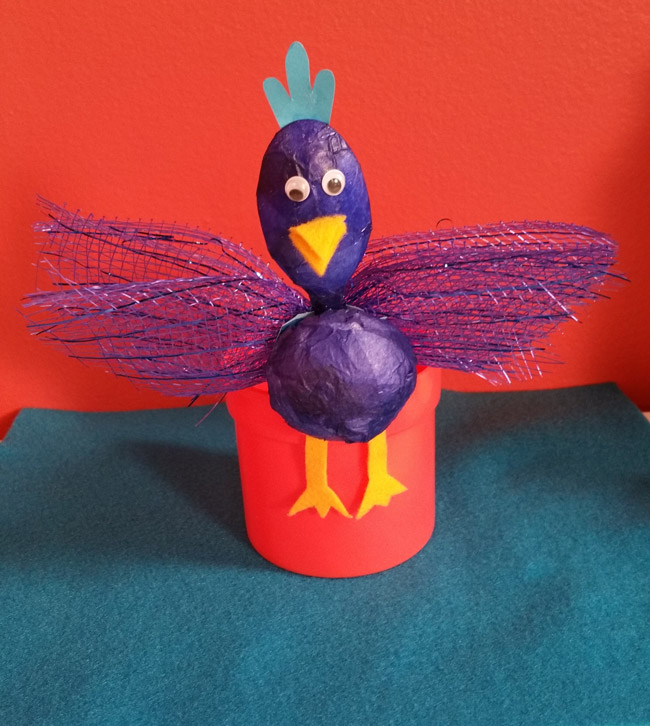
| Spoon Birds
|
 Host: Katie Hacker & Jenny Barnett Rohrs |
Age Range: 7 to 12 Grade Range: 2 to 6 Skill Level: Easy Appropriate for These Special Events: Supports Subject Area(s) of: Time needed for project:
SPOON BIRD Materials needed:
Basic Supplies: Directions:
|

Our Partners:
|


E-mail questions about Hands On Crafts for Kids to info@craftsforkids.com |