www.craftsforkids.com

Hands on Crafts For Kids is the resource for kids craft projects and instructions for kids 6-12 and parents, teachers and other group leaders. It includes school and curriculum based projects,  multi cultural projects, and every day, holiday and seasonal ideas.

It is  the online home of the public television program Hands On Crafts for Kids.

1812-1 Print | Close [X]

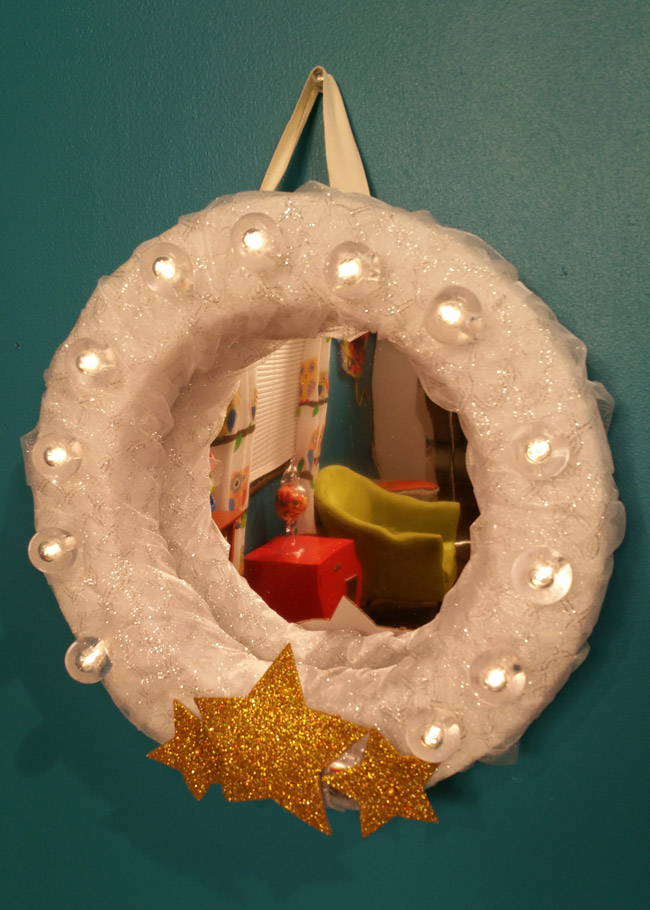
Marquee Mirror


Watch the video for this project online at: https://youtu.be/AWnhCVoy7Ls


Hosts: Jenny Barnett Rohrs

When you see the “helping hand” symbol on a project, it means you may need adult supervision to do the project.


Always cover your work surface with a mat or some type of protective covering like wax paper or plastic.
                                                    
Always use care when using tools or a heat source. Be careful and safe!

Age Range: 7 to 12

Grade Range: 2 to 6

Skill Level: Advanced

Appropriate for These Special Events:
Every Day and Rainy Days

Supports Subject Area(s) of:
Language Arts – e.g. step by step instructions
Mathematics - measuring
Visual Arts

Time needed for project:
2 hours


Marquee Mirror


Materials needed:

  1. Elmer’s® Craft Bond®Tacky Glue
  2. 12” FloraCraft® STYROFOAM™ flat wreath
  3. Light string
  4. Plastic knife
  5. Chopstick
  6. Tulle ribbon
  7. Straight pins
  8. U pins
  9. Plastic mirror
  10. Cardboard
  11. White glue
  12. Scrap of ribbon
  13. Glitter craft foam
  14. Scissors
  15. Marker

Directions:

  1. Using wreath as a guide trace the OUTSIDE on cardboard using a marker. Cut out with scissors.

  2. Using the INSIDE of the wreath as a guide, trace with marker on plastic mirror, making sure protective film covering is still on it. CUT 1 inch OUTSIDE of your traced line.

  3.  Using white glue, adhere the plastic mirror onto cardboard, centering the mirror. Let dry.

  4.  Using a plastic knife, cut a narrow channel for the light cord. Poke cord inside wreath. Use a pencil to poke a slightly bigger hole for lightbulbs. Repeat all the way around. Use a U pin to secure battery box to wreath. Add batteries. Add light bulb covers to light string.

  5.  Add light bulb covers to light string. Using tulle ribbon, wrap wreath going around completely. Use an extra wrap of tulle to secure battery box. Cut off excess tulle ribbon with scissors. Attach with U pins on back.

  6.  Remove protective film from mirror. Attach back with pins. Attach a ribbon hanger on back with pins.

 Cut stars from Glitter foam. Attach to the front with pins to cover battery box but still allow access.

For more information visit www.CraftTestDummies.com  

Our Partners:


www.elmers.com
www.makeitfuncrafts.com