|
Age Range: 7 to 12
Grade Range: 2 to 6
Skill Level: Advanced
Appropriate for These Special Events:
Every Day, Gift Giving and Rainy Days
Supports Subject Areas of:
Language Arts – e.g. step by step instructions
Mathematics - measuring
Visual Arts
Time needed for project:
1 hour
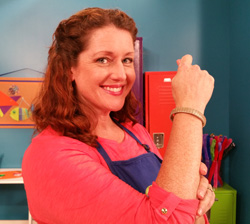
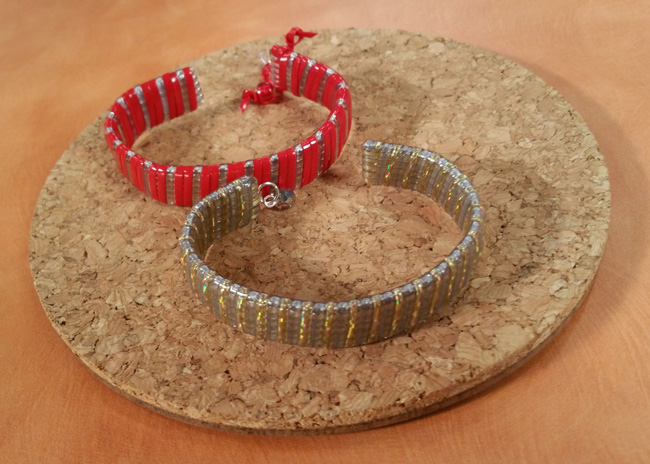
WRAP BRACELET
Designed by Lisa Galvin
Materials:
Pepperell® Braiding Company: Bracelet Jewelry Kit
NOTE: This project uses the following materials found in Pepperell Gold and Silver (combined) Bracelet Jewelry Kit:
- One 5” metal bracelet blank
- RexLace®
- 45” length Brightlace Gold
- 48” length Holographic Gold
- 48” length Silver Sparkle
One 6mm silver jump ring
One 2” silver beading head pin
One 6mm faceted silver glass bead
Small piece of sandpaper
Clear tape
Ruler
Scissors
Binder clip
Two bobby pins
Jewelry making pliers
Wire cutters
Directions:
- Preparation. Use sandpaper to sand edges and corners of metal bracelet form to remove any sharp edges. Measure, then cut five 9 inch pieces of Brightlace Gold RexLace® for bracelet base and one 48” length each of Holographic Gold and Silver Sparkle RexLace® for wrapping.
- Slide faceted bead onto head pin, use jewelry pliers to make a loop at top. Trim excess wire from head pin with wire cutters. Before closing, slide the loop onto a jump ring and set aside.
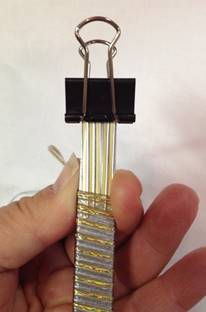
- Using short (9”) lengths, match all five lace ends side-by-side on one end and clip together to hold using binder clip. Align remaining length side-by-side and slide two bobby pin over all five lengths near binder clip. To hold alignment, slide bobby pins down lace lengths, leaving one in the middle, and the other 2” from opposite end. On same end, place 1 1/2" of loose lace ends onto back side of bracelet blank and apply clear tape about ¼” from end, wrapping the tape to front of blank to hold ends in place. (See Image 1)
- On same (back) side, place one end of each 48” lace color side-by-side and slip them UNDER the short strands in the ¼” pocket between taped section and end of bracelet blank, leaving a 1” tail. You may have to put pressure on the end as you wrap to keep the end secure. Fold remainder of the 9” lace lengths tightly over end of bracelet blank, trapping the ends of the 48” lengths within the ¼” pocket on back side. Applying pressure to the folded end, grasp the long strands and wind the Rexlace® around the blank, sliding bobbie pins down the length as you go to keep them aligned. Continue until you are a few inches from the opposite end. (See Image 2). Remove bobbie pins.
- Slip beaded jump ring onto one of the loose short lace ends (shown here at center). Fold the loose ends tightly over the blank, keeping beaded jump ring at end of blank. Continue wrapping the long Rexlace lengths to end of blank, covering all short lace ends to keep secure. (See Image 3 & 4).
- When you get to the end of bracelet, tuck the ends under the end folds using an EZ Beader®. Slip the EZ Beader® into the end, and thread the long strands of Rexlace® onto it. Carefully pull the EZ Beader® back through the bracelet ends and pull tight. This can be repeated for extra security.
- Trim lace to hide all ends with scissors. Next you can carefully fold the bracelet over your wrist, bending it into an arch or “C” shape.
Images for Reference
Image 1

Image 2
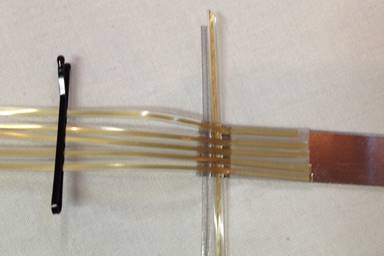
Image 3
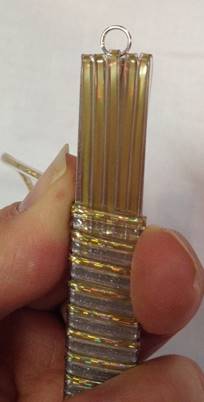
Image 4
|

