www.craftsforkids.com

Hands on Crafts For Kids is the resource for kids craft projects and instructions for kids 6-12 and parents, teachers and other group leaders. It includes school and curriculum based projects,  multi cultural projects, and every day, holiday and seasonal ideas.

It is  the online home of the public television program Hands On Crafts for Kids.

1910-1 Print | Close [X]

ROBOT BUTLER TRAY

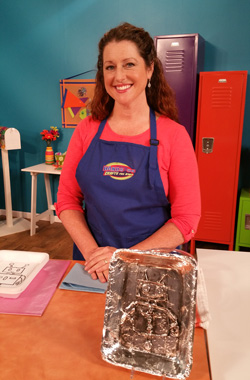
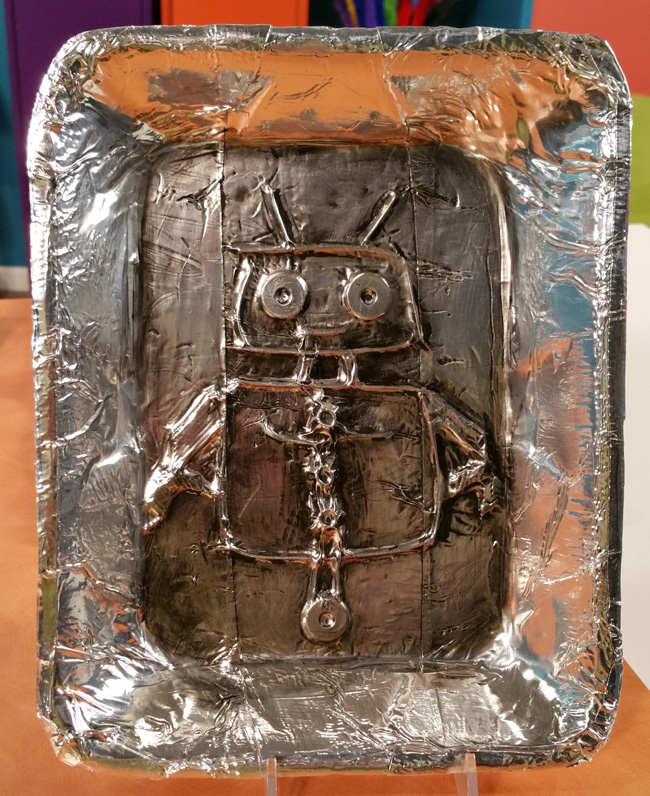
Jenny Barnett-Rohrs makes a metallic robot tray to hold coins and treasures. 

Watch the video for this project online at:
https://youtu.be/UNOhfB9PQbI


Hosts: Jenny Barnett-Rohrs

Always cover your work surface with a mat or some type of protective covering like wax paper or plastic.
                                                    
Always use care when using tools or a heat source. Be careful and safe!


Age Range: 7 to 12

Grade Range: 2 to 6

Skill Level: Moderate

Appropriate for These Special Events:
Every Day, Pretend Play and Rainy Days

Supports Subject Areas of:
Language Arts – e.g. step by step instructions
Visual Arts

Time needed for project:
1 hour


Robot Butler Tray

The future is now- and we’ll build a robot friend with household objects. He’ll “serve” us by holding our loose change and pocket treasures!

Materials:
Elmer’s® School Glue
Foam trays, clean and dry
Paintbrush
Plastic spoon
Noodles- spaghetti, penne, etc.
Washers
Metal flashing tape (adhesive backed)

HO_1910-1_INST_2.pdf

Directions:

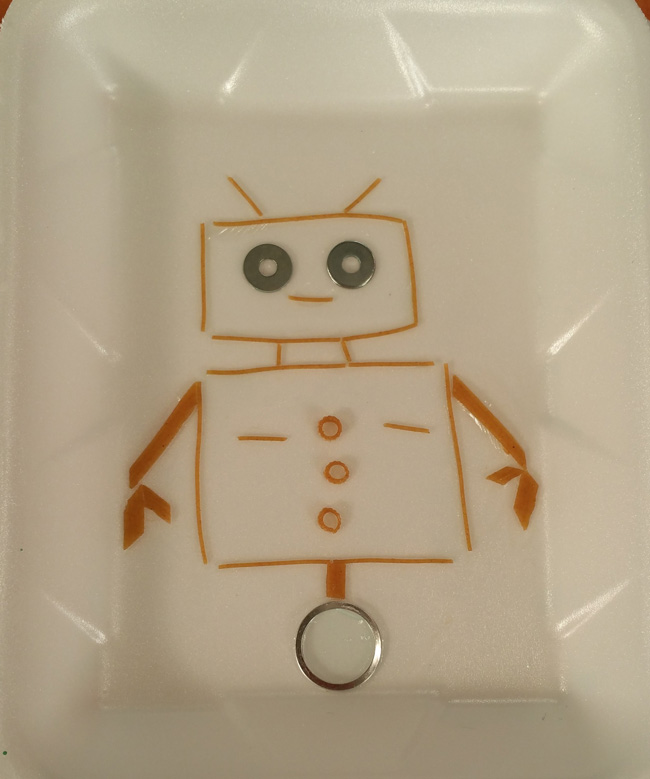
  1. Print out or make a template that fits the inside dimensions of the tray. Or draw your own! Place template down on tray and trace with the end of a paintbrush to create de-bossed lines in the foam.
  2. Soak noodles until soft.
  3. Brush glue onto the foam tray and arrange noodles and washers over your de-bossed lines. Be creative in adding shapes and personality to your Robot Butler Tray! Let dry.
  4. Rip or cut pieces of metal flashing tape 3 inches longer than the length of your tray. remove the paper backing and lay it down in the center of your design. Smooth gently with your fingers.
  5. Repeat step 4, overlapping strips by 1/4 inch to the right and left until the surface and sides are covered.
  6. Using the paintbrush end, gently trace around the design to define and tool the metal. Use the back of a plastic spoon to smooth down the sides.

For more information visit: www.CraftTestDummies.com


Our Partners:


www.elmers.com