Age Range: 7 to 12
Grade Range: 2 to 6
Skill Level: Moderate
Appropriate for These Special Events:
Every Day, Home Dec, Gift Giving, and Rainy Days
Supports Subject Areas of:
Social Studies
Language Arts – e.g. step by step instructions
Mathematics - measuring
Visual Arts
Time needed for project:
1 hour plus drying time
 
Recycling is beautiful when you take old CDs and create lovely sun catchers using glitter glue and a Mandala pattern
Materials:
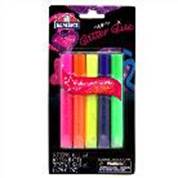
- Elmer’s® Glitter Glue
- Old CDs
- Sandpaper
- Copy paper
- Pencil
- Scissors
- Permanent marker
- Puffy paint
- Toothpicks or cotton swabs
- Cord for hanging
Directions:
- Using the sandpaper, lightly sand and CD to remove some of the shine and so the glue will stick well.
- Trace the CD onto paper using the pencil; cut the circle shape out.
- Make a template. It’s just like making a paper snowflake! First, fold the circle in half, fold the 1/2 circle into 3rds, fold the remaining wedge shape in half, snip off the bottom 1/3rd of the triangle, snip the edges of the top, both sides, make a snip in both sides of the triangle one higher and one lower.
- Place the template over the CD and mark all the places you snipped with a permanent marker.
- Using the permanent marker, “connect the dots” making scallops and points to create a unique, while symmetrical, design.
- Using black puffy paint, trace over your marker lines. Let dry
- Fill in the areas of your mandala using glitter glue- use cotton swabs to spread the glue around. You can mix colors if you like using toothpicks to create swirls or ombré effects. Let dry.
- Thread the cord though the center hole and tie a knot for hanging.
For more information visit: www.CraftTestDummies.com
|


