| |
 |
|
|
|
|
 |
|
|
| |

By Patty Cox
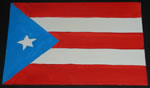
Puerto Rico
|
 When you see the “helping hand” symbol on a project,
it means you may need adult supervision to do the project. Always
use care when using tools or a heat source. Be careful and safe!
When you see the “helping hand” symbol on a project,
it means you may need adult supervision to do the project. Always
use care when using tools or a heat source. Be careful and safe!
|

|
Main supplies:
- Mason Ball®
pint jar and lid
- 16 oz light
corn syrup
- 1 teaspoon
Pacon® blue glitter
- 1 teaspoon
Pacon® silver glitter
- small shells
- small plastic
knife or xacto knife and rolling pin
Sand Clay Recipe: (enough for 3 sand
castles)
- 1 cup Sand,
light brown
- 11/2 cups
cornstarch
- 1/2 cup
white glue
- 1/2 cup
water
- 1/2 cup
flour
|
Instructions:
1. Pour 16 oz corn syrup into jar. Add glitter.
Add about 2-3 shells for shakers. Fill jar 1/8” from
the top with water. Place dome lid on mouth of jar. Screw
lid tightly. Shake contents.
2. Make clay recipe. Knead well. Press and roll clay between
2 sheets of wax paper to about 3/8” thick. Place jar
on clay. Cut clay circle base 1” larger all around jar
lid. Fold 1” edges around jar lid (globe base) and sides.
Place jar with clay on a piece of wax paper.
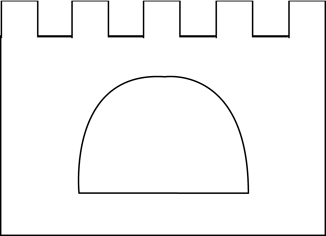
3. Cut out clay rectangle around fort pattern. Press rectangle
on one side of jar. Place pattern over top. Cut out window
opening and notches along top edge of clay. Remove window
clay and top notches. Move on to the next side of jar and
repeat. Cut four sides of fort around jar. Note: The chalky
residue on the glass can be removed easily with a dry cotton
swab after the clay dries.
4. Pull 1” balls from remaining clay. Press around jar
lid area of globe to build a hill at the foot of the fort.
Moisten fingers with water and smooth rough areas of clay,
if desired. Press shells into clay around base. Allow to dry
overnight. |
 |
Pacon®
Spectra® glitter,
|
| |
|
|
|
Home
| Television | Projects
| Book Order | Helping
Kids | Teachers | Philosophy
E-mail questions about Hands On Crafts for Kids to info@craftsforkids.com
© Copyright 2004 Katherine Stull, Inc.
|