| |
 |
|
|
|
|
 |
|
|
| |

By Mary Ayres
Puerto Rico
|
 When you see the “helping hand” symbol on a project,
it means you may need adult supervision to do the project. Always
use care when using tools or a heat source. Be careful and safe!
When you see the “helping hand” symbol on a project,
it means you may need adult supervision to do the project. Always
use care when using tools or a heat source. Be careful and safe!
|
|
Main supplies:
- Balloon
- Papier
mache medium
- Ziploc
bag
|
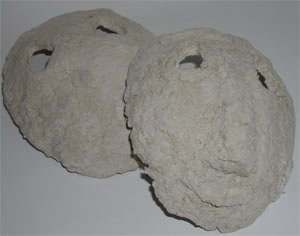
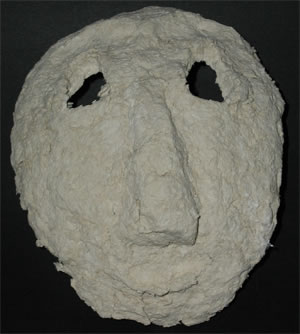
Instructions:
There are various ways to make Papier mache.
You can use newspaper strips and wallpaper paste or watered
down white glue; or use Celluclay or a Fast Mache Product.
Follow the package instructions to create the material. We
used Celluclay mixed with water in a clear zip lock bag. We
then blew up a balloon to the desired size and placed the
Celluclay on the balloon creating a mask shape. ( Hint: put
the balloon in a bowl to hold while applying Celluclay and
drying.) We added the nose and other features using more Celluclay.
Let dry completely. If a horn or piece falls off during drying
because it is a rounded surface, use heavy glue or a low temp
glue gun to attach later. Pop the balloon. Your mask is now
ready to paint |
| |
|
|
|
Home
| Television | Projects
| Book Order | Helping
Kids | Teachers | Philosophy
E-mail questions about Hands On Crafts for Kids to info@craftsforkids.com
© Copyright 2004 Katherine Stull, Inc.
|