Starting
Tips :
- Always measure the
correct amount of Lacing needed for your projects.
- Find the center by
folding your lacing in half and lining up your ends.
- Do not pull your stitches
too tight but tight enough to hold together.
- Be consistent in tightening
stitches.
- If you have to stop
use a paper clip to hold your ends together – no unraveling.
Instructions :
- Cut 2 pieces of plastic
lacing each piece 1 yard long. Use two school colors.
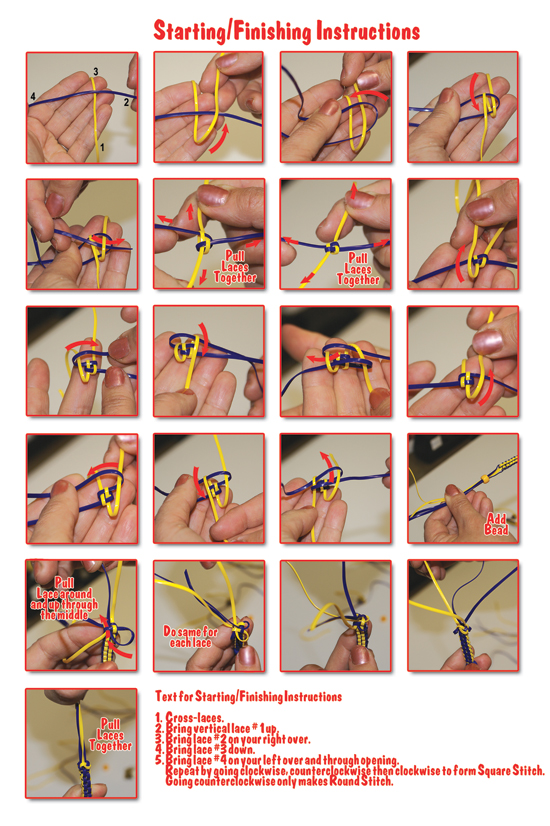
- Begin the Square Stitch
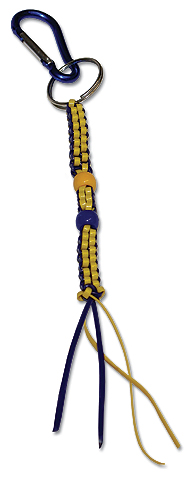
following the diagrams. Do seven Square Stitches
- Add a pony bead and
push up to stitches.
- Continue and do another
three Square Stitches and add second pony bead.
- Do another seven
Square Stitches. Keep the last stitch loose.
- Finish by inserting
one end up through the center at a time as shown. This is
done by picking up any one strand and taking it around the
strand to its left, then up through the middle of the last
stitch.
- Continue with the
remaining three strands. Slowly pull on these strands to
close the gap. Trim ends.
- Add lanyard hook
to beginning stitch.
Note: To do Square or
box Stitch start lacing counterclockwise, then clockwise,
then counterclockwise…follow this pattern over and over.
To do Round Stitch go in the same direction always. Go counterclockwise
only and your laces will spiral or go around.

For more information about plastic
lacing visit:
|


