| |
 |
|
|
|
|
 |
|
|
| |
Perpetual Calendar
By Sandy Laipply
1003-1
 When
you see the “helping hand” symbol on a project, it means
you may need adult supervision to do the project. Always use care
when using tools or a heat source. Be careful and safe! When
you see the “helping hand” symbol on a project, it means
you may need adult supervision to do the project. Always use care
when using tools or a heat source. Be careful and safe!
|

|
Main supplies:
- Elmer’s®
Rubber Cement
- Elmer’s®
Squeeze N Brush® Stencils: Sports
- Red and
white cardstock
- Royal®
Langnickel White Rub -on letters and numbers
- FloraCraft®Styrofoam®Brand
Plastic Foam – 2” thick
Basic Supplies:
- Ruler
- Pencil
- Fiskars®
scissors or paper trimmer
- Plastic
knife
|
Instructions:
- Measure, mark and
cut (24) 1 ¾” squares of white cardstock. Use
the blue pen to stencil 12 squares with the small star and
12 squares with the larger star.
- (Ask an adult to
cut (4) 2” cubes from Styrofoam®.)
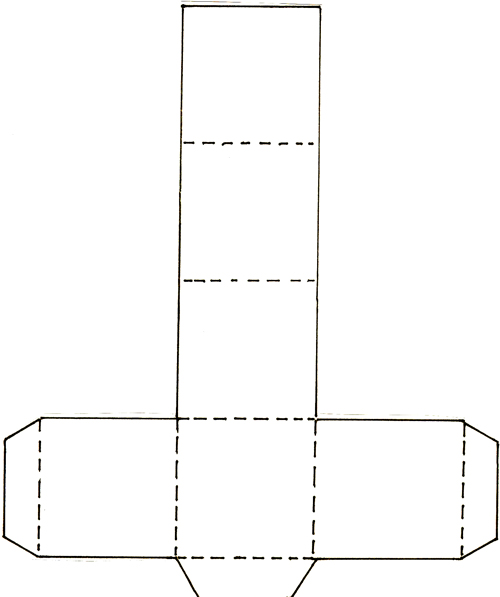
- Cut out the template
and use it to trace the pattern on red cardstock. Use a
plastic knife to score on dotted lines. Fold on scored lines,
using the plastic knife to crease each fold. Use rubber
cement to glue 6 decorated squares to the squares you have
created. Apply rubber cement to the flaps. Fold the cardstock
up around a Styrofoam® cube, securing flaps on the inside
of the cubes. Make 3 additional cubes.
- Measure, mark and
cut (24) 3/4” x 2” strips of red cardstock from
your scraps. Use the rub-ons to put the names of the months
on 12 of the strips, abbreviating the longer months. Put
the numbers 0 thru 8 on additional strips. Make an extra
strip for numbers 0, 1,and 2.
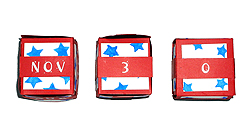
- Glue the months on
two of the cubes, one month on each side of the cube. Glue
the numbers 0,1,2,3,4,5 on one cube, and 0,1,2,6,7,8 on
the other cube. (The 6 becomes a 9 when needed by turning
it upside down.) Place the cubes on your desk and turn them
to show the date.

Sponsored By:
|
| |
|
|
Home
| Television | Projects
| Book Order | Helping
Kids | Teachers | Philosophy
E-mail questions about Hands On Crafts for Kids to info@craftsforkids.com
© Copyright 2004 Katherine Stull, Inc.
|


