| |
 |
|
|
|
|
 |
|
|
| |
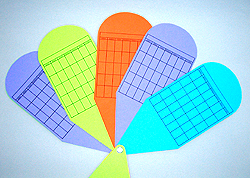
Moon Phase Planting Guide and Fan
Calendar
By Patty Cox
1003-5
|

|
Main supplies:
- Card stock
– colors of your choice
- Elmer’s®
Washable School Glue Stick
- Royal®
Graphite Tracing Paper
- 3/16”
threaded post with screw
Basic Supplies:
- Elmer’s®
Painters® Opaque Paint Marker, fine
tip – black
- Pencil
- Ruler
- Compass
- Fiskars®
paper punch- moon and circle
- Fiskars®
scissors
|
Instructions:
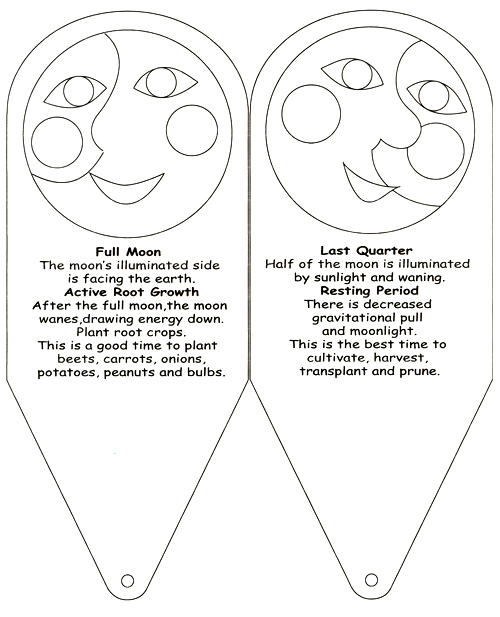
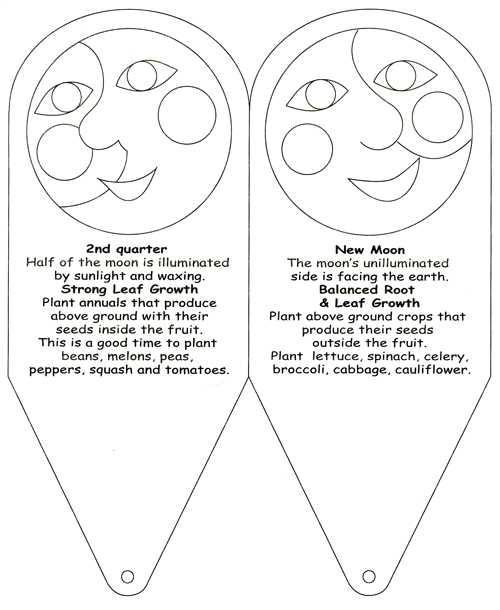
- Cut moon designs
from card stock. Us a compass to draw the 3 ½”
circles. Glue paper layers together with glue stick.
- Cut four guide book
pages from card stock according to pattern. Glue paper moon
face on each page. Using a fine point marker write the moon’s
planting information under each moon.
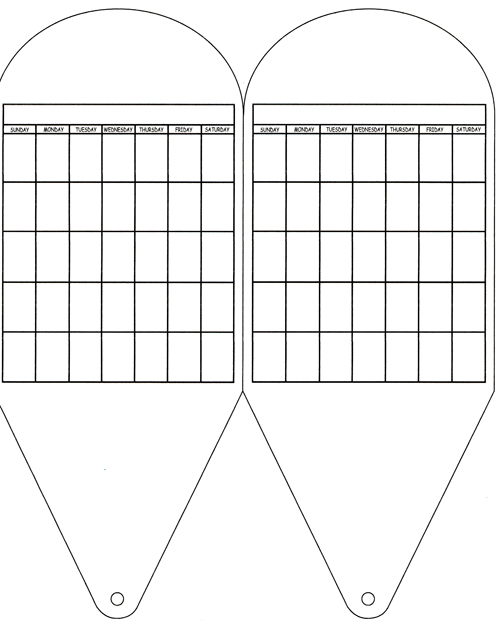
- Cut 12 guide book
pages from card stock according to pattern. Draw a calendar
page on each page according to pattern. Optional: Photocopy
or scan the calendar pages on colored paper. Write the calendar
month and days on each calendar page with a fine point pen.
Note: Calendar years with moon phases can be found on line
at time and date.com
http://www.timeanddate.com Use moon and circle paper
punches to cut small moons for calendar. Glue small moons
on each calendar month according to (time and date.com)
phases of the moon yearly calendar.
- Arrange moon page,
starting with New Moon then 2nd Quarter, Full Moon, and
Lat quarter, followed by the 12 calendar pages. Punch a
hole in the bottom of the top guide book page. Align additional
pages with the first page, then punch holes in all pages.
Insert a 3/16” threaded post with screw through all
page holes. Screw post together.
Sponsored By:
|
| |
|
|
Home
| Television | Projects
| Book Order | Helping
Kids | Teachers | Philosophy
E-mail questions about Hands On Crafts for Kids to info@craftsforkids.com
© Copyright 2004 Katherine Stull, Inc.
|