Hands On Crafts for Kids
Home
Television
Projects
Book Order
Helping Kids Philosophy Teachers

Plastic Cup Bug Lantern
Designed by Melony Bradley
1101-1

When you see the “helping hand” symbol on a project, it means you may need adult supervision to do the project. Always cover your work surface with a mat or some type of protective covering like wax paper or plastic. Always use care when using tools or a heat source. Be careful and safe!


Main supplies:

  • Dome shaped plastic cups
  • Indoor/outdoor light string
  • Elmer’s® Painters® Opaque Paint
  • Markers – black, white, red, yellow and blue
  • Elmer’s® Craft Bond™ Tacky Glue
  • Forster® Woodsies®, Jumbo
  • Woodsies® and Jumbo Woodsies® Too
  • Wood Shapes-
    eight medium circles, four XL teardrops, two small circles, two XXL hearts, two XL hearts
  • Movable eyes- six
  • 12” black chenille stem
  • Interior/Exterior Varnish

Basic Supplies:

  • Elmer’s® X-ACTO™ knife
  • X-ACTO™ self healing mat
  • Scissors
  • Masking tape
  • Paintbrush


Instructions:
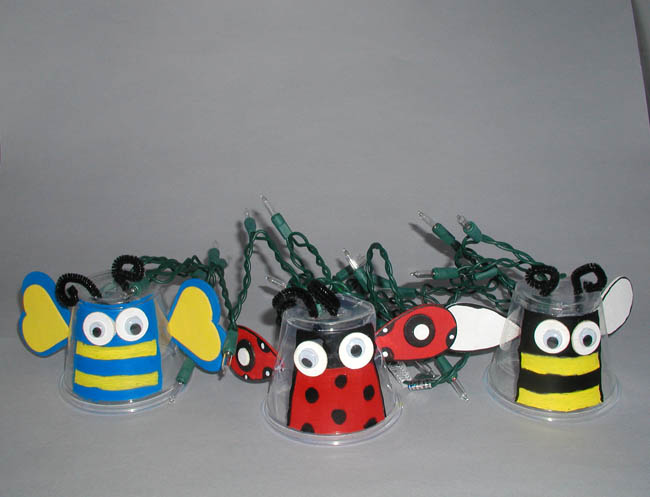
1.  Use painters marker to paint plastic cups for the following animals.
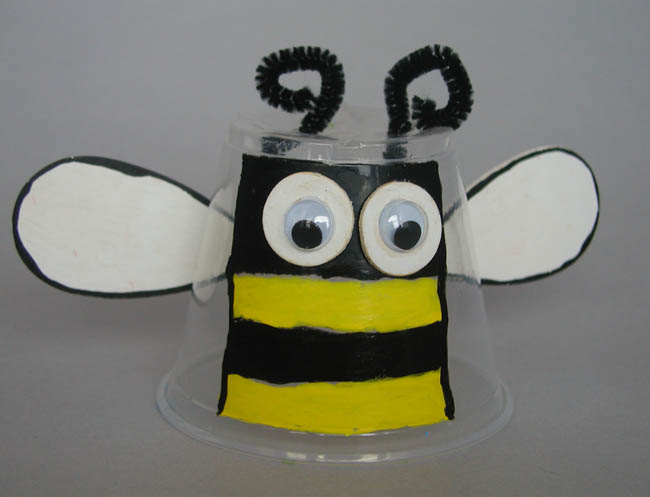
Bee- paint 1” x 2” band of black at top. Alternate ½” yellow and black bands under 1” band.
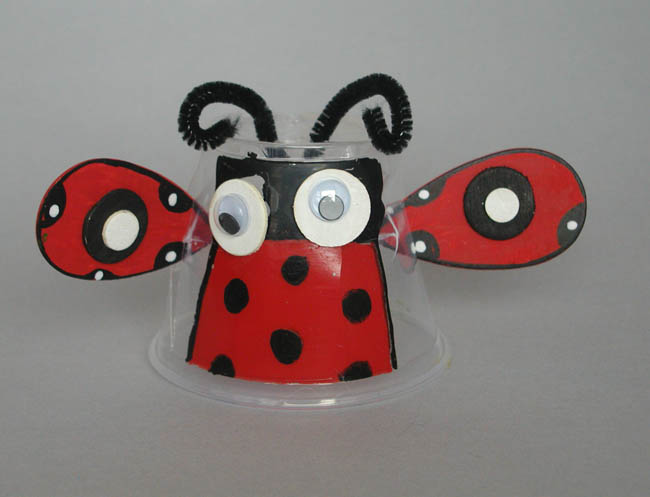
Ladybug-Paint a 1” x 2” black band at top. Paint remaining area below red to bottom of cup.
Butterfly- paint a 1” x 2” band of blue at top. Paint alternating ½” rows of blue and yellow to bottom. Allow to dry and coat over paint with varnish.    

2.  Paint wood shapes with paint markers. Paint six medium circles and two small circles white. Paint two XL teardrops white. Paint XXL hearts blue. Paint XL hearts yellow. Paint two XL teardrops red. Paint two medium circles black. Outline teardrop shapes with black painters pen. Draw spots on red teardrops with black and white Painters markers.

3.  Glue wood shapes together as shown with Craft Bond and attach wiggle eyes to white circles for three sets.

4.  Glue eyes to bugs with Tacky Glue. Pierce slit in sides of bugs for wings with X-ACTO knife or scissors and insert wings. Cut chenille stems to six lengths of 4” each. Bend ends for antennae. Pierce holes for antennae at top of cups. Place a small amount of Tacky Glue on each piece and insert into holes.

5.  Pierce hole for light. Attach bugs to light string.


Sponsored by Elmer’s® Products, Inc.
www.elmers.com


Home | Television | Projects | Book Order | Helping Kids | Teachers | Philosophy
E-mail questions about Hands On Crafts for Kids to info@craftsforkids.com
© Copyright 2009 Katherine Stull, Inc.