| |
 |
|
|
|
|
 |
|
|
| |
1102-2
 |
When
you see the “helping hand” symbol on a project, it means
you may need adult supervision to do the project. Always cover your work surface with a mat or some type of protective covering like wax paper or plastic. Always use care when using tools or a heat source. Be careful and safe! |
|
|
- Elmer’s® Painters® Opaque Paint Markers – Brights
- Elmer’s® 3-D™ Glitter Paint Pens
- Elmer’s® Craft Bond™ Tacky Glue
- Dowel – ½” or thick stick
- Paint stir stick – free at home builder stores
- Liter bottle – cleaned and dry
- Scissors
- Wire – 20 gauge – silver
- Wire cutters
- Brown paper bag
- Tape
- Hole punch – 1/8”
- Bird seed
- Pencil
|
 |
This project features notes or instructions in Adobe Reader format. If you
do not have Adobe Reader, download it for free here. |
Click here to download Bird Feeder pattern (PDF)
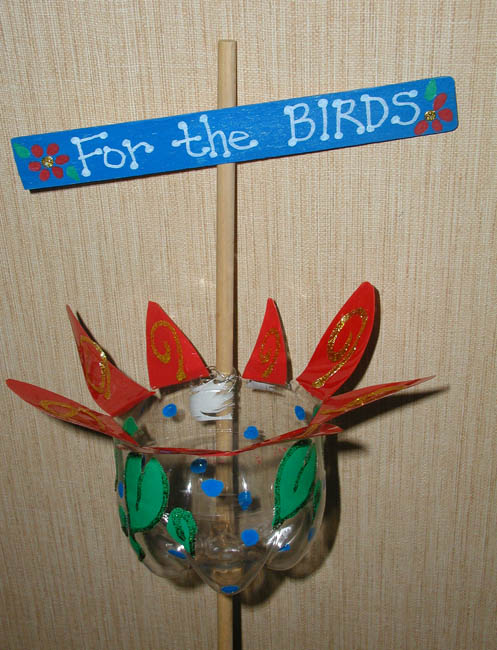
- Use sharp scissors to cut top from clean, dry litter bottle. Insert pattern inside bottle till it fits along bottom edge. Hold in place with small rounds of tape.
- Use scissors to cut along pattern lines through plastic and pattern, creating petals. Remove pattern.
- Start red paint marker following label instructions. Paint the outside of each petal filling in entirely with red, ending color at fold line of each petal. Let dry.
- Use green paint marker to paint on leaves where desired referring to photo for placement. Add a few smaller leaves. Let dry.
- Carefully fold down petals to outside creasing plastic of each.
- Add a swirl of Gold Glitter to the top of each petal then outline each leaf with Green Glitter. Let dry.
- To create sign, start by using sharp scissors to cut notched section from paint stirrer. Carefully sand edges with brown paper bag to smooth if needed. Paint front and edges with blue paint marker following the grain of the wood. Let dry.
- Lightly pencil on words to sign, then paint over lines with White paint marker. To create flower add a white center dot then red petals and small green leaves. Set aside to dry. Add a small dot of Glitter Gold in center of each flower. Let dry.
- Use a hole punch to add two holes next to each other at the opening between petals. Use wire cutters to cut a 14” length of wire. Use wire cutters to form a notch in dowel about 8” from one end. Twist the dowel as you press the wire cutters on the dowel. This will form a notch for the wire to set.
- Fold wire in half then insert ends through inside to back. Tightly wrap ends around notch on dowel then insert through holes again – do this a few times then twist ends of wire tightly to secure. Cut ends and bend inside feeder.
- Apply a bead of Tacky Glue to middle back of sign then press where desired on dowel. Hold with tape if needed till dry.
- Insert in lawn or garden then fill with birdseed.
|
|
| |
|
|
Home
| Television | Projects
| Book Order | Helping
Kids | Teachers | Philosophy
E-mail questions about Hands On Crafts for Kids to info@craftsforkids.com
© Copyright 2009 Katherine Stull, Inc. |