|
This project features notes or instructions in Adobe Reader format. If you
do not have Adobe Reader, download it for free here. |
Click here to download Folded Iris Pattern A (PDF)
Click here to download Folded Iris Pattern B (PDF)
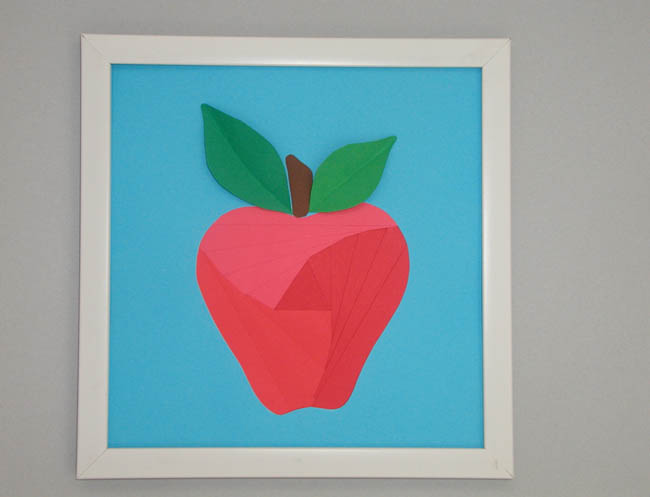
- Cut out apple, leaves and stem patterns. Place apple pattern just under center on turquoise paper then use pencil to trace around. Cut out center of apple shape leaving remainder of paper intact.
- Use ruler to mark off 1” strips on paper then cut. Stack by color off to side.
- Place apple iris folding pattern on work surface then line up opening in turquoise paper over pattern. Use masking tape to hold both papers in place.
- The design will be worked on the back. The pattern will be flipped over when finished. Iris folding takes its name from the lens of a camera – with concentric layers towards the center. The design is worked from the outside toward the center.
- Apply a layer of glue stick glue on the turquoise paper next to the area marker “1”. Press a strip of lightest red paper into the area marked “1”, pressing onto the glue. Trim ends to about 1”. Apply glue to edge next to area marked “2”. Press medium colored paper into area, pressing to secure. Apply glue to area next to “3” then press on darkest paper. Trim ends. Repeat steps following number sequence always working light to dark. Apply glue to the paper closest to the number and trim ends to prevent too much bulk. Cut a square of dark paper slightly larger that center and glue in place. Flip over paper to see patterned design.
- Trace small leaf on light green paper and larger on dark. Cut out. Fold each leaf lengthwise down center then open up. Cut stem from brown paper. Apply a thin bead from Glue Pen onto back of stem and press in place at top of apple. Apply a thin bead along fold line on back of leaves then position in place. Let dry.
- Place design in purchased frame or cut a frame from Foam Board to fit the image.