| |
 |
|
|
|
|
 |
|
|
| |
1108-3
 |
When
you see the “helping hand” symbol on a project, it means
you may need adult supervision to do the project. Always cover your work surface with a mat or some type of protective covering like wax paper or plastic. Always use care when using tools or a heat source. Be careful and safe! |
|
|
- Prang® Oval 8 Watercolors
- Prang® Metallic Watercolors
- Cardstock – 12” x 12” white with texture (2)
- Plastic liter bottle
- Bowl with water
- Paper towels
- Pencil
- Scissors
- Hole punch – 1/8”
- Elmer’s® Glue Pen
- Ribbon – 1/8” satin yellow – 4 yards
- Large eyed needle
|
 |
This project features notes or instructions in Adobe Reader format. If you
do not have Adobe Reader, download it for free here. |
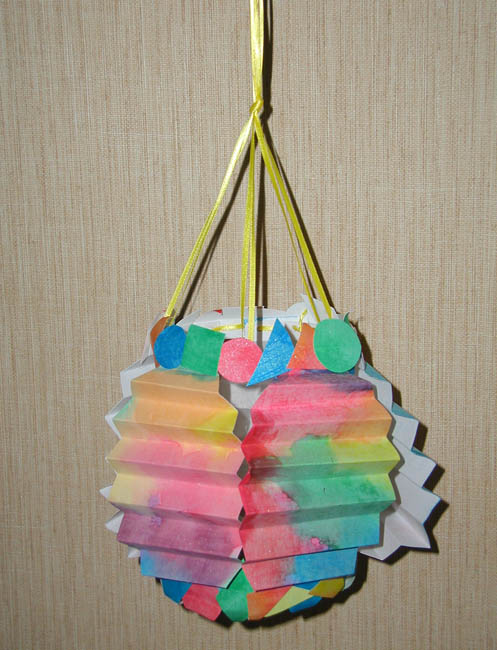
Click here to download the Paper Lantern Pattern. (PDF)
- Place a layer of paper towels on work surface, place a sheet of white paper onto paper towels.
- Add a few drops of water to each of the colors in the Watercolor 8 Oval paint strip. Using the brush from paint box, paint in sections of paper with watercolors blending colors at edges where they meet. Be sure to clean brush between each color to prevent colors mudding. Repeat steps on other paper. Let dry.
- Wet Metallic Water colors and let set a few minutes. Brush coordinating color of Metallic paint over color on paper, cleaning brush between colors. Let dry.
- Use a pencil to trace 5 lantern patterns on back of paper then cut out. Trace geometric shapes onto remainder of paper and cut out – about 30 all together.
- Wash and dry liter bottle. Using sharp scissors, cut top and bottom from liter bottle. Use scissors to evenly trim the edges of the center section. Use the hole punch to punch holes about ½” apart along the top and bottom edges of the center section.
- Fold a lantern section in half then accordion fold ½” along the remainder of the section. Unfold then refold so the entire section is accordion folded the correct way. Repeat steps with remaining sections.
- Use the hole punch to punch a hole in the center of ends then one ½” from center hole creating three at each end.
- Measure and cut 24” of ribbon. Thread onto needle. Tie a large knot at one end. Line up holes at end of section with holes on liter bottle. Thread needle in and out of holes to secure section to base. Skip three holes then sew on another section. Sew remaining sections in place tying a knot to secure end of ribbon. Cut another section of ribbon then sew lower sections in place.
- Cut remaining ribbons into thirds. To create hanger, thread a piece of ribbon through a hole then add other two ribbons equally spaced around top edge. Pull up ribbon ends, adjust as needed then tie a knot to secure all ends.
- Using Glue Pen, add a thin bead of glue on center back of geometric shape then position in place along top edge to cover ribbon. Let dry then glue shapes to lower section.
 |
|
|
|
| |
|
|
Home
| Television | Projects
| Book Order | Helping
Kids | Teachers | Philosophy
E-mail questions about Hands On Crafts for Kids to info@craftsforkids.com
© Copyright 2009 Katherine Stull, Inc. |