| |
 |
|
|
|
|
 |
|
|
| |
1110-1
 |
When
you see the “helping hand” symbol on a project, it means
you may need adult supervision to do the project. Always cover your work surface with a mat or some type of protective covering like wax paper or plastic. Always use care when using tools or a heat source. Be careful and safe! |
|
 |
- Precious Mug Perma-Coat Porcelain Kit ™
- 20 gauge plastic coated wire in colors of choice
- Styrofoam™ mug insert
- Moss
- Plastic serrated knife
- Photos, cards, etc. of choice
- Pony Beads
- Scissors
- Pencil
- Wire cutters
- Elmer’s® Glue-All
- Cutting Mat
- Paper towel
|
- Wipe mug with a paper towel. Draw desired design with the markers included in the kit. Let dry 10 minutes.
- Have an adult use the knife to cut 1 inch from the foam insert. Place the foam in the mug. Cover the top with the moss. Use a little glue to secure the moss in place.
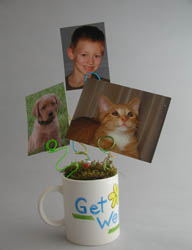
- Cut pieces of wire from 6 – 18 inches long. Wrap wire around your finger 3 times. Add some pony beads if you like. Remove from finger. Bend stem as desired. Insert in foam in mug. Repeat with 5-7 additional wires to make a bouquet in the mug. Vary the height of the wires.
- Insert photos, cards, etc. in wire holders.
|
|
| |
|
|
Home
| Television | Projects
| Book Order | Helping
Kids | Teachers | Philosophy
E-mail questions about Hands On Crafts for Kids to info@craftsforkids.com
© Copyright 2009 Katherine Stull, Inc. |


