| |
 |
|
|
|
|
 |
|
|
| |
42
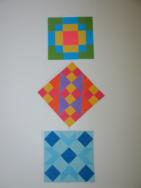
The industrial revolution brought many changes as women no longer had to spin their own fabrics for their family. As more cotton in colors and prints were available quilting became a hobby. In the 1840’s block styles became popular. When the sewing machine was invented, women could make clothing faster, leaving more time for quilting. We’re making traditional quilt blocks from paper.
Age Range: 7 to 12
Grade Range 1 to 6
Skill Level: Moderate
Appropriate for These Special Events
Every Day and Rainy Days
Supports Subject Area(s) of:
Social Studies
Language Arts – e.g. step by step instructions
Visual Arts
Math – e.g. measuring
Time Needed for Project:
1 hour
 |
This project features notes or instructions in Adobe Reader format. If you
do not have Adobe Reader, download it for free here. |
|

|
- Elmer’s® Foam Board
- Elmer’s® Repositionable Glue Stic
- Cardstock or construction paper – desired colors
- White poster board

- Ruler
- Pencil
- Scissors
- Quilting thread
- Pushpin
- Scrap paper
|
- Determine colors for quilt. Use ruler and pencil to mark off 1” squares on back of each paper.
- Measure and cut a 6.5” square of poster board.
- Starting along top row of quilt, about 1 ½” from top edge of poster board, place colored squares to form first line of design. Place a square on scratch paper, right side down, then cover with Glue Stick making sure glue is along edges. Press piece back in place. Glue remainder of pieces of line in place butting edges together.
- Place sections for next line and glue in place. Glue all pieces in place to finish square. Use scissors to trim poster board leaving about a ¼” border on all sides. Glue to foam board.
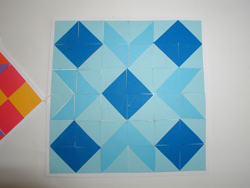
- Create desired number of quilt squares changing colors and designs. Some designs may have a square cut in half at an angle. Glue triangles together to form a square.
- To create hanger, use push pin to create a small hole at either end of square. Cut an 18” length of quilt thread, insert into one hole than other. Pull up ends to create hanger, determine length and trim thread as needed then tie a double knot.
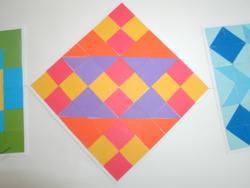
- The next square is “on point”. Punch a hole on opposite corners and center bottom of first square. Thread thread through holes several times then tie a knot. Repeat with last square.
|
Travel around the world and experience the culture, arts and traditions that make the world unique. Visit Peru, Italy, Canada, USA, Australia, Japan, China, Russia, India, Mexico, Ghana, Egypt, and Scotland.
Click here to order now!
|
|
| |
|
|
Home
| Television | Projects
| Book Order | Helping
Kids | Teachers | Philosophy
E-mail questions about Hands On Crafts for Kids to info@craftsforkids.com
© Copyright 2010 Katherine Stull, Inc. |


