| |
 |
|
|
|
|
 |
|
|
| |
64
After the Japanese invasions of Korea in 1592 and 1598, a number of skilled Korean potters who had learned from the Chinese how to produce fine porcelain, were brought back to Japan. Some of these settled in Arita in northern Kyushu, where they discovered porcelain clay. One of the Korean porcelain makers was Ri Sampei. He is considered as the father of Japanese porcelain. The area became Japan's major center of porcelain production and its products were exported from the port of Imari. Arita porcelains were typically made with deep-blue patterns on a white background, called sometsuke meaning blue-and-white. In the 1640s, a new style called aka-e was invented, characterized by bright colors and bold patterns principally in red. These two styles dominate Japanese "Arita/Imari" wares.
Age Range: 7 to 12
Grade Range: 1 to 6
Skill Level: Moderate
Appropriate for These Special Events:
Every Day and Rainy Days
Supports Subject Area(s) of:
Social Studies
Language Arts – e.g. step by step instructions
Visual Arts
Math – e.g. measuring
Time Needed for Project:
1 hour plus drying time
|

|
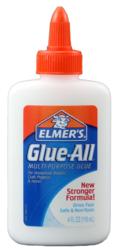
- 3 Tablespoons Elmer’s® Glue-All™
- 2 Tablespoons cornstarch
- 2 Tablespoons flour
- 1 teaspoon baby oil
- 1 teaspoon vinegar
- Elmer’s® Painters® Opaque Paint Markers
Clear acetate surface (or use an old cd case cover)


- Measuring spoons
- Craft stick
- Disposable cup or bowl
- Optional: fingernail file
Cover work surface with wax paper or plastic.
|
- Mix the ingredients in a disposable cup with a craft stick. Stir until ALL cornstarch and flour is mixed in the glue mixture. The consistency will be like thick frosting.
Recipe makes two thin butterflies or one thick butterfly that dries to 3/16” thickness.
Spreadable Porcelain Clay Recipe
3 Tablespoons Elmer’s® Glue-All™
2 Tablespoons cornstarch
2 Tablespoons flour
1 teaspoon baby oil
1 teaspoon vinegar
2. Tape a piece of clear acetate over pattern. Spread clay frosting within the pattern outline using a craft stick. Drips and smears can be trimmed or filed away with a fingernail file when the piece is completely dry. Recipe makes two thin butterflies or one thick butterfly. Allow clay mixture to dry overnight.
Tip: While spreading clay in small pattern areas; spread clay then lift craft stick and stir little circles over the area. More clay will pull off the craft stick onto the small space.
- Keep the drying clay on acetate to decorate. The bottom may still be damp, but the top can be decorated using a fine-tipped permanent marker. Allow clay to dry. Peel away acetate backing. Lay the dried side on a flat surface allowing the back to dry.

|
Travel around the world and experience the culture, arts and traditions that make the world unique. Visit Peru, Italy, Canada, USA, Australia, Japan, China, Russia, India, Mexico, Ghana, Egypt, and Scotland.
Click here to order now!
|
|
| |
|
|
Home
| Television | Projects
| Book Order | Helping
Kids | Teachers | Philosophy
E-mail questions about Hands On Crafts for Kids to info@craftsforkids.com
© Copyright 2010 Katherine Stull, Inc. |


