Hands On Crafts for Kids
Home
Television
Projects
Book Order
Helping Kids Philosophy Teachers

1313-1 Scotland
Castle Tower Keeps

Designed by Patty Cox

Castle Towers and the Development of Castle Towers, or Keeps are the central part of any defensive castle plans. Often round and hollow they would have living quarters on the upper floors. If they were part of a town wall or an outer ring then the rear of the tower would often be open.
Castle Keeps can be round, square, rectangular or polygonal.

Inverness Castle sits on a cliff overlooking the River Ness, in Inverness, Scotland.

When you see the “helping hand” symbol on a project, it means you may need adult supervision to do the project. Always cover your work surface with a mat or some type of protective covering like wax paper or plastic. Always use care when using tools or a heat source. Be careful and safe!

Always cover your work surface with a mat or some type of protective covering like
wax paper or plastic.

Age Range: 7 to 12

Grade Range: 1 to 6

Skill Level: Advanced

Appropriate for These Special Events:
Every Day and Rainy Days

Supports Subject Area(s) of:
Social Studies
Language Arts – e.g. step by step instructions
Visual Arts

Time Needed for Project:
2 hours plus drying time


Main supplies:

  • FloraCraft® STYROFOAM™ Brand Foam Kit Project Bricks 300pc
    (hexagon tower uses 300 pieces)
  • Elmer’s ® Craft Bond™ Tacky Glue
  • ½” round glass marbles, desired colors
  • Acetate or wax paper
  • Elmer’s® Foam Board – 11” Square
  • Craft sticks


Basic Supplies:

  • Rubber bands
  • Scissors
  • Craft knife
  • Plastic serrated knife
  • Craft sticks
  • Stiff paint brush
  • optional: earth tone chalk and stiff brush for ‘aging’ the bricks
  • optional: battery-powered flicker candle


Instructions:

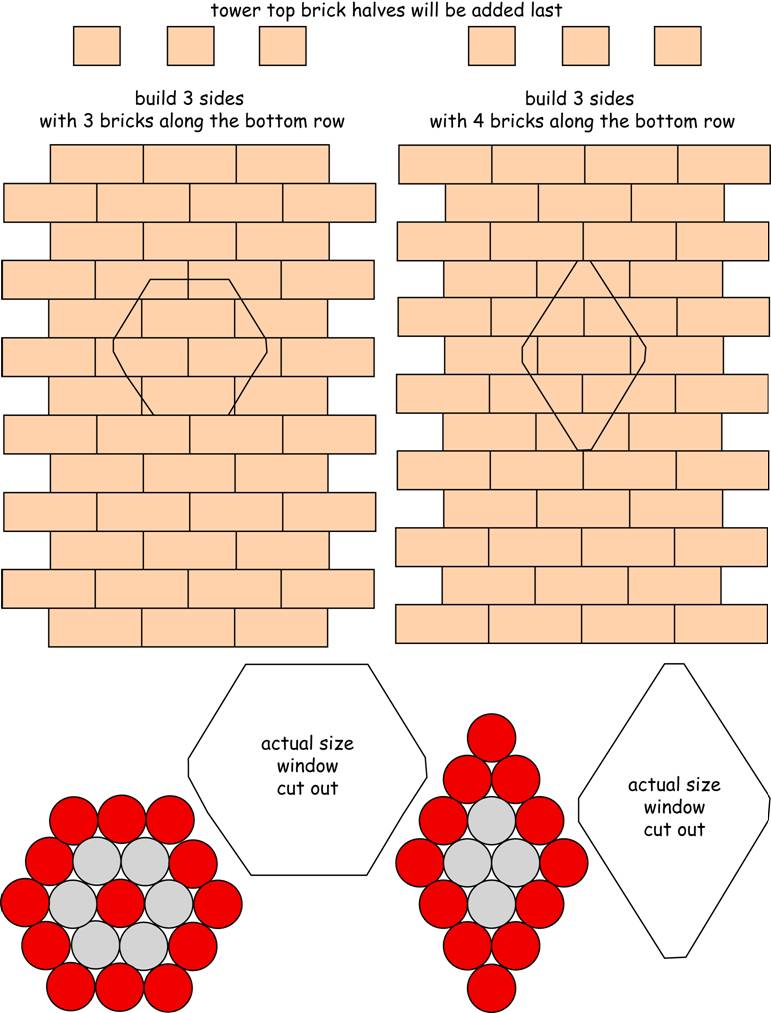
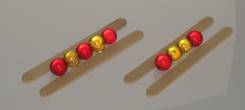
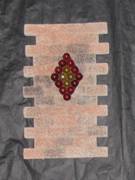
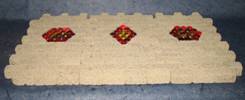
  1. Prepare a work surface of wax paper or acetate. Glue the center row of each window together using tacky glue. Align the round marbles by placing a craft stick on each side of the row. Allow glue to set.

  2.  

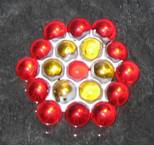
  3. Glue remaining rows of marbles in position around the center row. Allow glue to set. Apply a generous amount of tacky glue between marbles. Let dry.


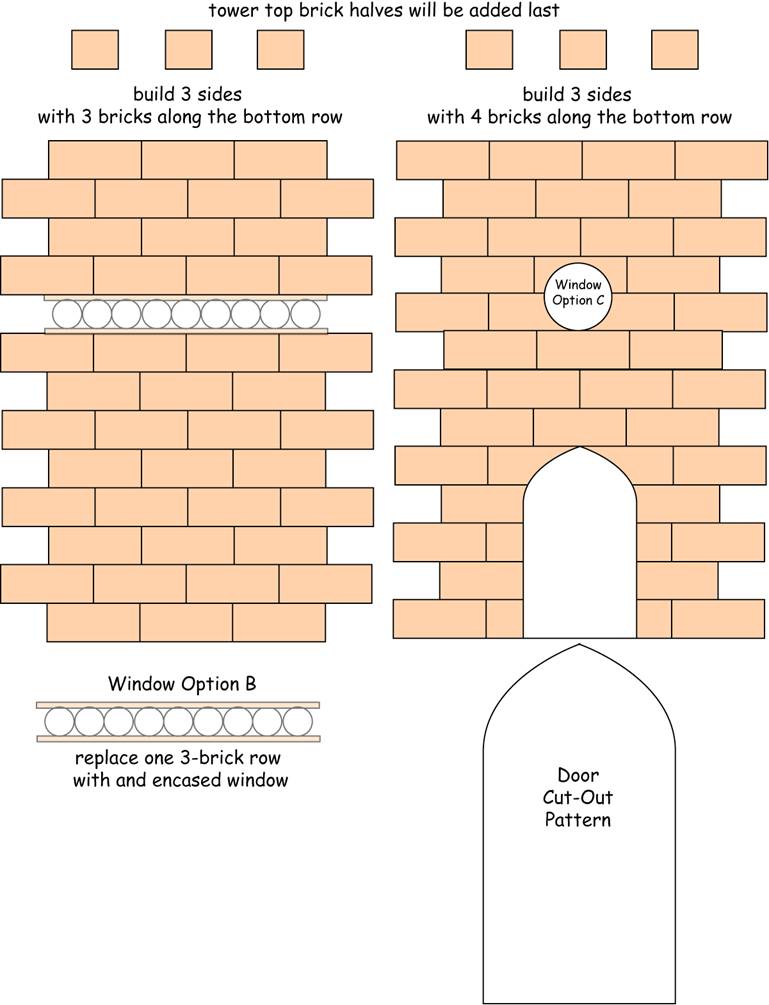
    Window Option B Step-by-step: Use this method if you prefer to build your castle tower one row at a time, from the ground up.

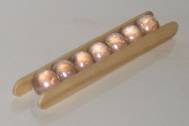
    1. Glue a row of seven ½” round marbles together using tacky glue. Align the marbles by placing a craft stick on each side of the row. Allow glue to set.
    2. Glue a craft stick on each side of marbles. Glue in place of a row of three bricks.


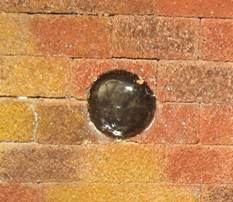
    Window Option C Step-by-step: Position a large flat marble on Styrofoam brick surface. Hold in place as a template. Cut around marble using a craft knife.
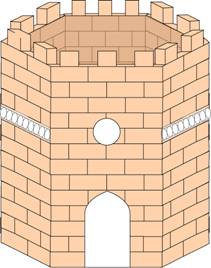
     

    Tower Step-by-step:


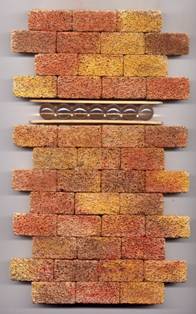
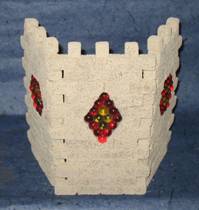
    1. Build and glue tower sides according to diagram. Build three sides with four bricks on the top and bottom row. Build three sides with three bricks on the top and bottom row. Allow glue to dry.

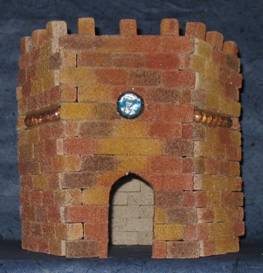
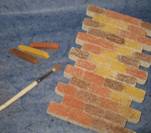
    2. The Styrofoam bricks can be colored and  ‘aged’ using chalk. Color brown, rust and yellow ochre colored chalk on Styrofoam bricks. Rub chalk into Styrofoam with a stiff paintbrush. Spray colored surface with workable fixative.


    3. Window option A: Cut out window placement according to actual size patterns using a craft knife. Apply glue along the inside edges of window opening. Gently press the window’s outer edge marbles in the styrofoam opening. Turn wall over on a flat surface to dry.

         Optional: Cut out door according to pattern using a craft knife.


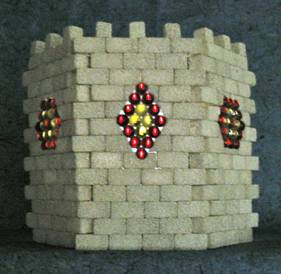
    4. Assemble tower sides into a six-sided hexagon. Apply glue on each outer ledge of the wall sections. Position a wall section on each side of the glued center. Slide the walls together in a straight line, then angle outer walls back. Repeat for remaining three walls. Glue and join the two sections together.


    5. Cut remaining bricks in half using a craft knife. Glue brick squares along top of tower according to pattern. Optional: Place tower on an 11” piece of foam board. Trace the tower’s interior perimeter on board. Cut out hexagon. Insert foam board inside castle to create a ‘second floor’. Place a battery-powered flicker light on board to illuminate windows.


Sponsored by FloraCraft
www.floracraft.com

Sponsored by Elmer’s® Products, Inc.
www.elmers.com

Series 1300 Crafts Around the World  is now available as a DVD set for $49.99 plus $6.00 shipping and handling . Travel around the world and experience the culture, arts and traditions that make the world  unique. Visit Peru, Italy, Canada, USA, Australia, Japan, China, Russia, India, Mexico, Ghana, Egypt, and Scotland.
Click here to order now!


Home | Television | Projects | Book Order | Helping Kids | Teachers | Philosophy
E-mail questions about Hands On Crafts for Kids to info@craftsforkids.com
© Copyright 2010 Katherine Stull, Inc.