| |
 |
|
|
|
|
 |
|
|
| |

By Dimples Mucherino
|
 |
Main supplies:
- Polyform®
Sculpey® clay – white
- Polyform®
Sculpey® glaze
- Delta Ceramcoat®
acrylic paint – yellow, black, red
- 1”
Brass key ring
- 4-1/2”
Length 18 gauge copper wire
Basics supplies:
- Fiskars® diagonal
cutter
- Fiskars® needle
nose pliers
- Paint brushes
|
 When you see the “helping hand” symbol on a project,
it means you may need adult supervision to do the project. Always
use care when using tools or a heat source. Be careful and safe!
 |
Instructions:
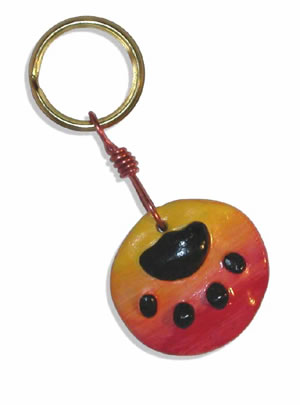
1. Knead a portion of
the white clay and roll into a 1” ball. Press down with
palm to form a disk.
2. Form a small ball of clay into the large lower part of
the paw. Gently press onto clay disk. Roll four very small
balls of clay, flatten slightly and gently press into clay
disk above large section of the paw. Insert end of wire, or
a toothpick ¼” from the top edge of disk to make
a hole.
3. Bake disk on an oven proof glass surface at 275ºF
for 15 minutes per ¼” of thickness, with good
ventilation. DO NOT USE MICROWAVE OVEN. Avoid over baking.
Let cool.
4. Paint paw print black. Let dry. Paint surrounding area
of disk yellow. Let dry. While paint is still wet, dry brush
disk with red. Let dry. Apply a coat of gloss glaze. Let dry.
5. Insert one end of wire 1” through hole in disk. Bend
end back to form a loop. Insert opposite end of wire through
key ring. Bend end back towards center. Wrap end of wire around
center covering opposite end of wire. Trim excess with cutters.
|
| |
|
|
Home
| Television | Projects
| Book Order | Helping
Kids | Teachers | Philosophy
E-mail questions about Hands On Crafts for Kids to info@craftsforkids.com
© Copyright 2004 Katherine Stull, Inc.
|


