| |
 |
|
|
|
|
 |
|
|
| |

By Barb Zimmerman
|
 |
Main supplies:
- 9”
Diameter lampshade
- Forster®
Woodsies™ tags – 4 each small circles, medium circles,
small
squares, medium squares; 8 large tags
- Delta
Ceramcoat® Acrylic paint – turquoise, pink, purple,
silver, white
- Eight
7/8” jewelry pins
- 24”
Length 18 gauge silver wire and 22 Gauge pink wire
Optional supplies:
- Pacon® pony beads -
purple
Basics supplies:
- Hand drill
- Paint brushes
- Craft snips
|
 When you see the “helping
hand” symbol on a project, it means you may need adult
supervision to do the project. Always use care when using
tools or a heat source. Be careful and safe!
|
Instructions:
1. Drill a hole opposite the existing hole
on all wood tags using a hand drill.
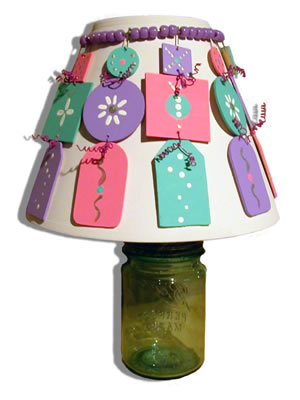
2. Paint all wood tags with pink, turquoise and purple paint.
Refer to photo. Let dry.
3. Embellish wood tags with white and silver painted designs.
Refer to photo. Let dry.
4. Cut a 5” length of pink 22 gauge wire. Starting with
one small round shape, string one piece of wire through bottom
hole and into top hole of a medium circle. Twist to secure
and coil ends. Attach a wood tag in the same manner to bottom
of medium circle. Repeat until you have 8 separate wood strands.
5. Attach each wood strand to silver wire with a jewelry pin.
Wrap wire around top, outside edge of lamp shade. Twist ends
to secure. Coil ends.
Optional:
String pony beads on silver wire between each
strand of wood tags.
|
| |
|
|
Home
| Television | Projects
| Book Order | Helping
Kids | Teachers | Philosophy
E-mail questions about Hands On Crafts for Kids to info@craftsforkids.com
© Copyright 2004 Katherine Stull, Inc.
|


