| |
 |
|
|
|
|
 |
|
|
| |

By Patty Cox
Bahamas
|
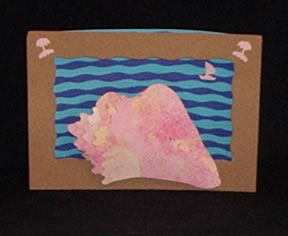
|
Main supplies:
- Pacon®
9” x 12” heavy weight white construction paper
(or watercolor paper or bristol board)
- Pacon®
9” x 12” dark blue construction paper
- Pacon®
turquoise and white tag board
- sandpaper
- Fiskars®
scissors and Kidzorstm edger scissors, worm and camel
- Royal®
colored chalk or pastels
- plastic
knife
- pie pan
- glue stick
- foam tape
dots (Pop Dots)
|
Instructions:
1. Marble: Cut a sheet of white construction
paper in half. Pour about 1 cup water in pie pan. Shave pink
and yellow chalk dust over water with knife. Swirl water once.
Drop construction paper on water surface, then quickly remove.
Lay marbled paper flat to dry.
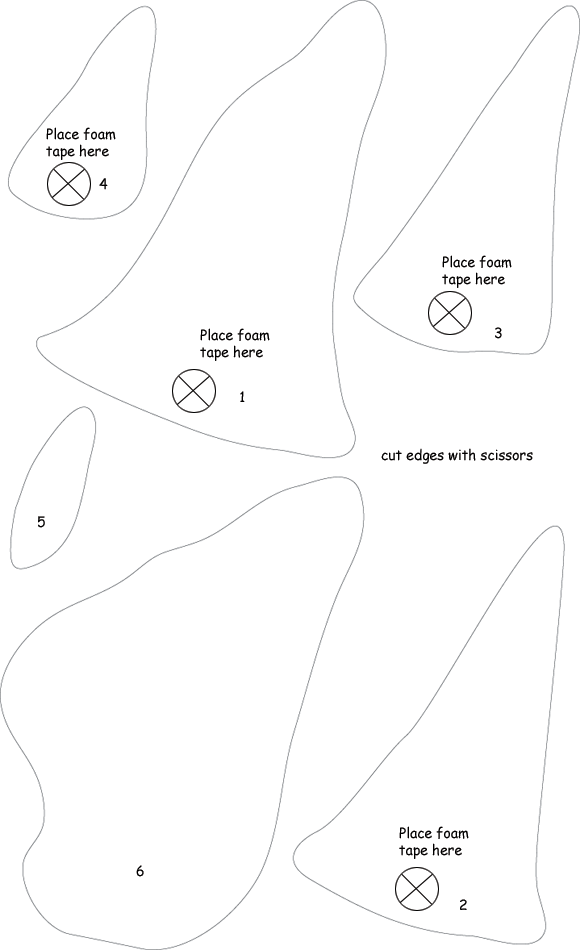
2. Cut out conch shell sections from dried paper. Cut top
of each shell section with camel edger scissors.
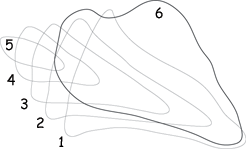
3. Layer Conch: Stick a small foam tape dot under the largest
conch (1), at the edged cut. Adhere the next size smaller
conch section (2) below the first, extending the top edge
about 3/8”. Continue layering and adhering conch sections
(1-5) with foam tape dots. Adhere the shell back (6) to the
back of layered conch.
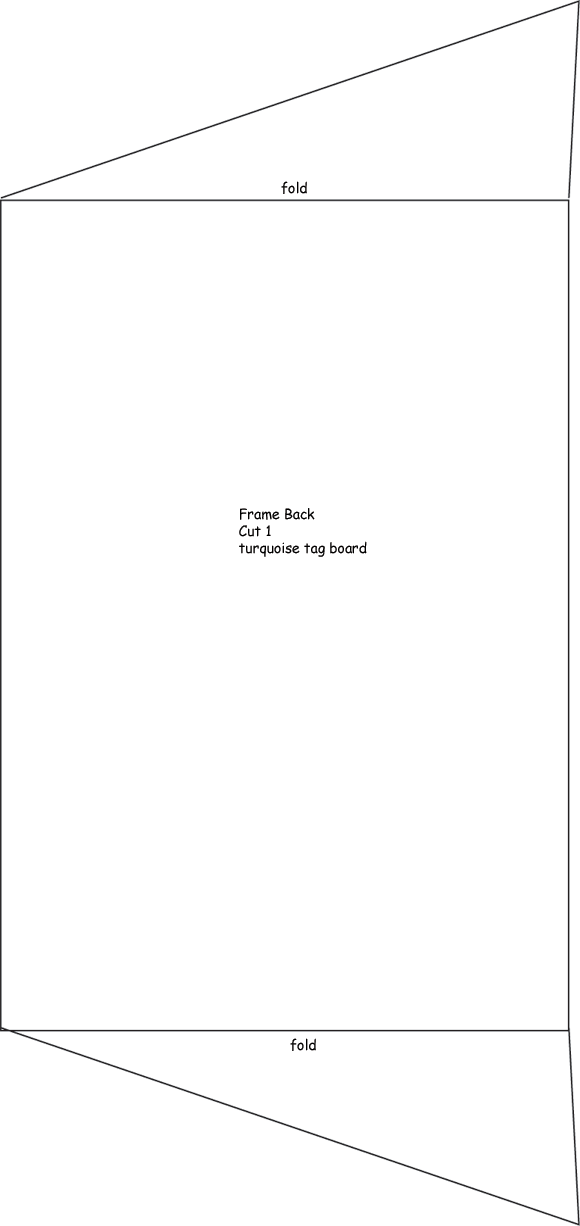
4. Frame Back: Cut frame back from turquoise tag board. Cut
narrow strips of dark blue paper using worm edger scissors.
Glue dark blue strips horizontally on frame back as shown.
Score frame sides at fold.
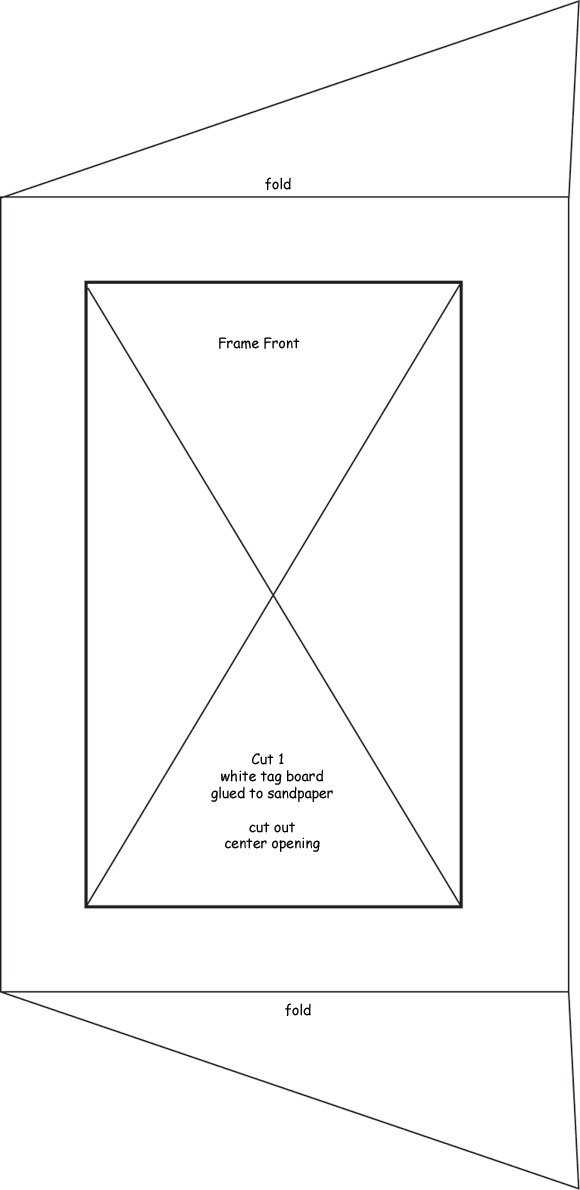
5. Frame Front: Transfer frame front pattern on white tag
board. Glue tag board to sandpaper back. Cut out frame. Score
frame sides at fold. Cut a large X in frame center. Use worm
edger scissors to cut out frame center.
6. Assemble Diorama: Glue frame sides to diorama sides, curving
diorama to back. Adhere conch to sandpaper frame with adhesive
foam dots.
|
Pacon® 9” x 12” construction paper, tag board
Fiskars® scissors and Kidzorstm edger scissors, paper
punches, Royal® chalk
|
| |
|
|
Home
| Television | Projects
| Book Order | Helping
Kids | Teachers | Philosophy
E-mail questions about Hands On Crafts for Kids to info@craftsforkids.com
© Copyright 2004 Katherine Stull, Inc.
|


