| |
 |
|
|
|
|
 |
|
|
| |

By Patty Cox
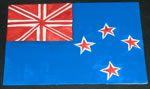
New Zealand
|
|
Main supplies:
- Pacon®
Waffle Papertm yellow, red, blue, green
- 12”
x 16” Pacon® Corrobuff® corrugated cardboard, red
- Thick white
glue
- glue stick
- Fiskars®
decorative edger scissors
- Fiskars®
1/8” paper punch
- 10”
wooden skewer
- Pacon®
Lick n’ Stick art tape, white
- 46”
Pacon® nylon filament
- needle
- kite string
- Royal®
Graphite paper
- Fiskars®
Scissors
|
Instructions:
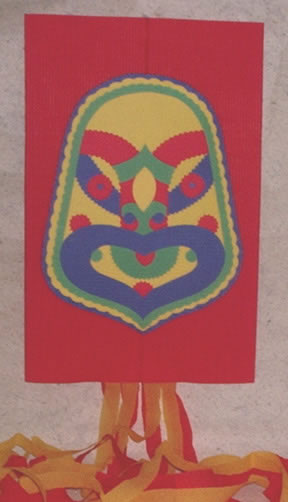
1. Trace pattern. Lay pattern on graphite paper
and trace on to various colors of waffle paper using the picture
as a guide. You can also choose your favortie colors! Cut
Maori face patterns from waffle paper using scissors and edger
scissors. Overlap and glue layers together following pattern.
Lay the finished face on a different color of waffle paper
and glue down. Trim 1/2” from edge using decorative
edge scissors. Lay this finished face on another different
color of waffle paper. Glue. Trim 1/2”from edge using
decorative edge scissor.
2. Fold corrugated cardboard in half lengthwise, right sides
together. Crease fold. Apply tacky glue along center fold
to 1/2” away from center fold. Fold kite in half, right
sides together. Secure glued fold, or the spine of the kite
with paper clips until glue dries.
3. Punch an 1/8” hole in spine next to the body of the
kite and 5” from one kite end. Open kite wings. Slide
a skewer through hole forming the kite cross. Cut two 51/2”
pieces white Lick n’ Stick. Dampen tape. Place over
each skewer end. Rub over tape to adhere skewer to kite back.
4. Fold long sides of kite under 1/2”. Glue.
5. Thread needle with 26” nylon filament. Insert needle
through spine, 1/2” from kite top. Tie a secure knot
in filament around spine. Insert needle and other end of filament
in spine, 1/2” from kite bottom. Tie a secure knot in
filament around spine. Thread needle with 20” nylon
filament. Insert needle under folded paper edge at one end
of cross. Tie a secure knot in filament. Insert needle under
folded paper edge at other end of cross. Tie a secure knot
in filament. Tie kite string to the intersection of the nylon
filament bridle. Dot all knots with glue.
6. Cut 1/2” wide strips of crepe paper for kite tails.
Cut eight. Glue tails on kite bottom center. Cover glued area
with white Lick n’ Stick. Center and glue Maori face
on right side of corrugated cardboard.
|
| Pacon®
Waffle Papertm, Corrobuff® corrugated cardboard, Lick n’
Stick art tape, nylon filament , Fiskars® edger scissors,
paper punch; Royal® Graphite paper |
| |
|
|
Home
| Television | Projects
| Book Order | Helping
Kids | Teachers | Philosophy
E-mail questions about Hands On Crafts for Kids to info@craftsforkids.com
© Copyright 2004 Katherine Stull, Inc.
|