| |
 |
|
|
|
|
 |
|
|
| |

By Patty Cox

Tahiti
|
 When you see the “helping hand” symbol on a project,
it means you may need adult supervision to do the project. Always
use care when using tools or a heat source. Be careful and safe!
|

|
Main supplies:
- 42 oz. oatmeal
container
- 1 sheet
Pacon® 12” x 18” Madras tissue paper, yellow blends
- white glue
- 1 tablespoon
DecoArt® Americana® Brown
- crylic paint
- 1”
Royal Kids Choicetm flat paint brush
- disposable
cup
- Royal®
colored pencils
Optional:
- clear acrylic
finish
- 5”
round embroidery hoop, outer ring with screw
- 81/2”
kid skin leather (or vinyl, or shower curtain plastic works well
too)
- Royal®
Graphite paper
- Fiskars®
Scissors
- Optional
- Compass
|
Instructions:
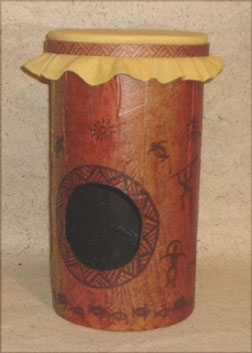
1. Remove outer paper from oatmeal container.
Draw a 3” circle on container, 2” from the bottom.
Cut out circle. (Optional - use a compass to make the circle)Tip:
The circle can be cut out by cutting a big X in the center
of circle, then cut out circle with scissors. Have an adult
help!
2. Mix about 1/4 cup glue with 1 tablespoon water in a disposable
cup. For an antiquing mixture, add 1 tablespoon brown acrylic
paint to mixture. . Brush a generous amount of glue mixture
around cardboard container. Brush glue mixture inside top
rim, inside the bottom rim and inside the 3” circle.
3. Place tissue paper on a flat dry surface. Roll the cardboard
container over tissue paper, covering container sides. Fold
top and bottom edges of tissue to inside of box top and under
the lower rim. Puncture a hole in tissue in the circle center.
Fold tissue edges to inside of box. Brush another coat of
glue mixture over entire tissue surfaces, including the overlapped
edges and inside of hole. Let dry. Note: The paper will wrinkle,
adding a wood grain effect.
4. Optional: Paint inside of drum with black paint.
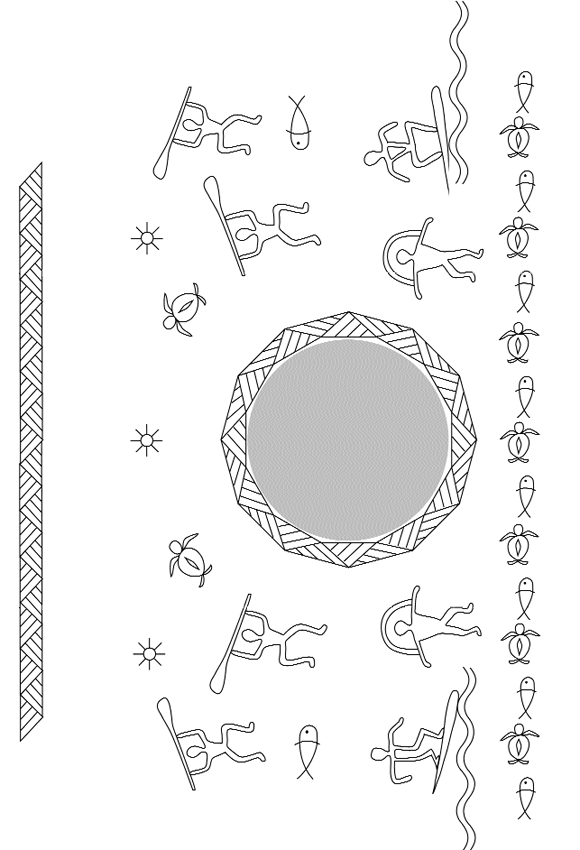
5. Trace carving patterns with pencil by placing graphite
paper between pattern and drum surface. Color in wood carving
patterns around drum with brown colored pencil. Shade inside
edges of patterns with black colored pencil. Optional: Brush
with clear acrylic finish.
6. Cut an 81/2” circle kid skin or vinyl. Center over
container top. Open embroidery hoop screw to largest setting.
Push ring over skin on container top. Pull skin edges tightly.
Screw embroidery hoop tightly. |

Pacon® Madras tissue
paper, Royal® Kids Choicetm Brushes and Graphite paper,
DecoArt® Americana® Acrylic paint; Royal® Colored
Pencils |
| |
|
|
|
Home
| Television | Projects
| Book Order | Helping
Kids | Teachers | Philosophy
E-mail questions about Hands On Crafts for Kids to info@craftsforkids.com
© Copyright 2004 Katherine Stull, Inc.
|


