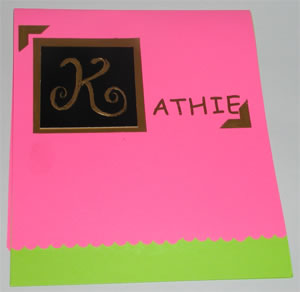
Instructions:
1. Cut an 8 ½ x 11 sheet of construction
paper in half and fold to form card. Cut a second sheet in
half and fold. Place over first card and trim top edge with
decorative edge scissors. Glue the 2 cards together.
2. Cut a piece of engraving board to a 2 ½” square.
Use scrap paper and free hand a letter for practice. Transfer
onto the engraving board with pencil. Scrape away letter to
reveal the gold leaf.
3. Apply rub ons to front of card - . We used a gold frame,
two corners and letters to spell out a name. Lastly glue illumined
letter in center of square.
Illuminated latter can
be used in many ways to make cards or note cards. You can
make only the first letter of your last name and mat the letter
in different colors on the front of the card; or you can spell
out a whole name. Experiment with different colors of engraving
board and construction paper. |


