| |
 |
|
|
|
|
 |
|
|
| |

by Patty Cox |

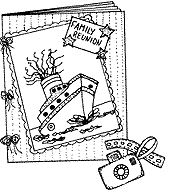
Make a 3-D Album Cover using
glue and paper in a very unique way. It will be the perfect place
to store all the photographs you'll take on your trip!
You will need:
- Bemiss-Jason Corobuff®,
- Shredded Craft Confetti,
- Construction & Tissue
Paper;
- Fiskars® Punches,
- Student Scissors & Paper
Edgers;
- Darice®
- Embellishments & Raffia;
- Elmer's®
- Craft Bond™
- Glue Stick,
- Gloss Decoupage Finish &
Fun
Dimensions™ Ice-A-Delic Cool Gel
Instructions:


 |
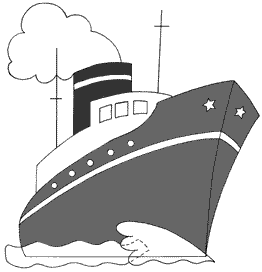
- Trace the entire pattern
onto white construction paper. Cut around the outside edge
of ship. Trace and cut red and black pattern pieces for
hull and smokestack. Punch holes and stars in hull as shown,
then glue onto main ship pattern.
- Place ship on 8" x
10" white background paper (cover) then draw a line to mark
the horizon. Set the ship aside.
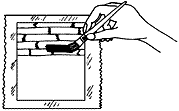
- Place cover on wax
paper. Tear red, pink, orange, yellow and blue tissue paper
into 1" wide strips. Brush decoupage finish onto the paper
above horizon. Lay overlapping strips of red, pink, yellow
and orange tissue paper onto wet surface to make different
shades for the sunset. Glue blue tissue paper strips below
the horizon for the water.
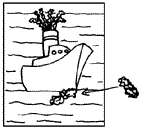
- Brush decoupage finish
over the back of the ship. Place on the cover. Tuck, then
glue white confetti shreds under the top of the smoke stack.
Brush decoupage finish over the whole page.
- To make waves, crumple
pieces of white tissue paper then glue on top of the blue.
Make a "V" shape with one piece of crumpled paper and place
at the front of the ship. Apply icy gel to the edge of the
waves to make them sparkle. Set aside to dry. Trim edge
of paper with decorative edge scissors then glue onto blue
corrugated paper (coruboard).
- Punch 3 holes into
the same channel on the long edge of the coruboard about
1/2" from the edge. Punch one hole about 2" from the top,
one hole 2" from the bottom and the third hole in the center.
Place on top of second piece of coruboard, wrong sides together.
Mark holes then punch holes in second piece. Tie boards
together with raffia.
- Write, stamp or stencil
the title onto a 11/2" x 31/2" piece of yellow paper. Glue
onto orange paper then trim with decorative scissors. Glue
to the front. Decorate with buttons if desired.
|
|
Home
| Television | Projects
| Book Order | Helping
Kids | Teachers | Philosophy
E-mail questions about Hands On Crafts for Kids to info@craftsforkids.com
© Copyright 2004 Katherine Stull, Inc.
|


