| |
 |
|
|
|
|
 |
|
|
| |
|

by Annabelle Keller
Lines and triangles
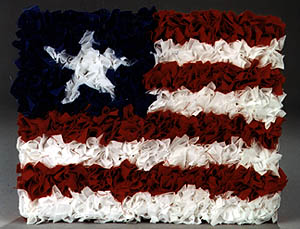
make up this punch design from fabric squares. This easy technique
can be used with a variety of materials and styrofoam.
|
|
You will need:
- 1" x 8" x 10"
Styrofoam® sheet
- 1/8 yd Blue, 1/3 yd White
and 5/8 yd Red
- 44/45" wide cotton
fabric 44" Red 7/8" Grosgrain ribbon
- 1 1/2" Picture hanger
with nails
- Tacky Glue
- Scissors
- Sheet of white 8 1/2"
x 11" paper
- Fine point permanent marker.
- #2 pencil
- Straight pins
|
 |
|
Instructions:
-
Measure
and draw the flag design on the Styrofoam as shown on the diagram.
Copy the star pattern onto a piece of paper, cut out. Pin in
place in the center of the 4" x 5" section of the
Styrofoam. Trace around with a marker, then remove.
-
Cut a 9"
x 11" piece of red fabric and set aside. Cut remaining
red, blue and white fabric into 1 1/2" strips. Cut the
strips again into 1 1/2" squares.
-
Spread a
thin layer of glue inside the star outline. Place a piece of
white fabric over the end of the pencil then, using the pencil
as a tucking tool, push the fabric about 1/4" into the
styrofoam. Placing the fabric tufts about 1/2" apart fill
the star with white. Using the same technique fill the area
around the star with blue fabric tufts and stripes with red
and white.
-
Glue large
piece of red fabric on the back with the excess on the sides,
then glue ribbon around the edge.
-
Glue the
hanger to the center back of flag 1" below top. Place glue
on nails and push thru holes into flag.
|
Home
| Television | Projects
| Book Order | Helping
Kids | Teachers | Philosophy
E-mail questions about Hands On Crafts for Kids to info@craftsforkids.com
© Copyright 2004 Katherine Stull, Inc.
|


